
How to Apply False Eyelashes: Step-by-Step Guide
Table of Contents
Introduction
Ever catch yourself staring in the mirror, wishing your lashes were just a little more… everything? Longer, fuller, more dramatic? You’re definitely not imagining things—false eyelashes really can transform your entire look in seconds. Whether you’re getting ready for date night, your best friend’s wedding, or you just want to feel fabulous on a Tuesday morning, knowing how to apply false lashes is honestly one of the best beauty skills you can master. And if you’ve tried before and ended up with wonky, half-attached lashes? Don’t worry. We’ve all been there.
Here’s the thing about perfect false lash application: it’s not magic, it’s technique. Getting it right comes down to picking lashes that actually work with your eye shape, using the right tools, and knowing a few insider tricks. Most people get intimidated because they think it’s complicated, but once you know what you’re doing, it becomes second nature. The goal isn’t to look like you’re wearing fake lashes—it’s to look like you were blessed with naturally amazing ones.
You’ve got options when it comes to false lashes, and that’s where things get fun. Strip lashes give you drama quickly, individual lashes let you customize exactly where you want volume, and magnetic lashes? They’re a total game-changer if you’re nervous about glue. Each type has its sweet spot depending on what you’re going for. And here’s something most people don’t realize—your eye shape actually matters when choosing lashes. Round eyes, almond eyes, hooded eyes—they all have lashes that work better than others.
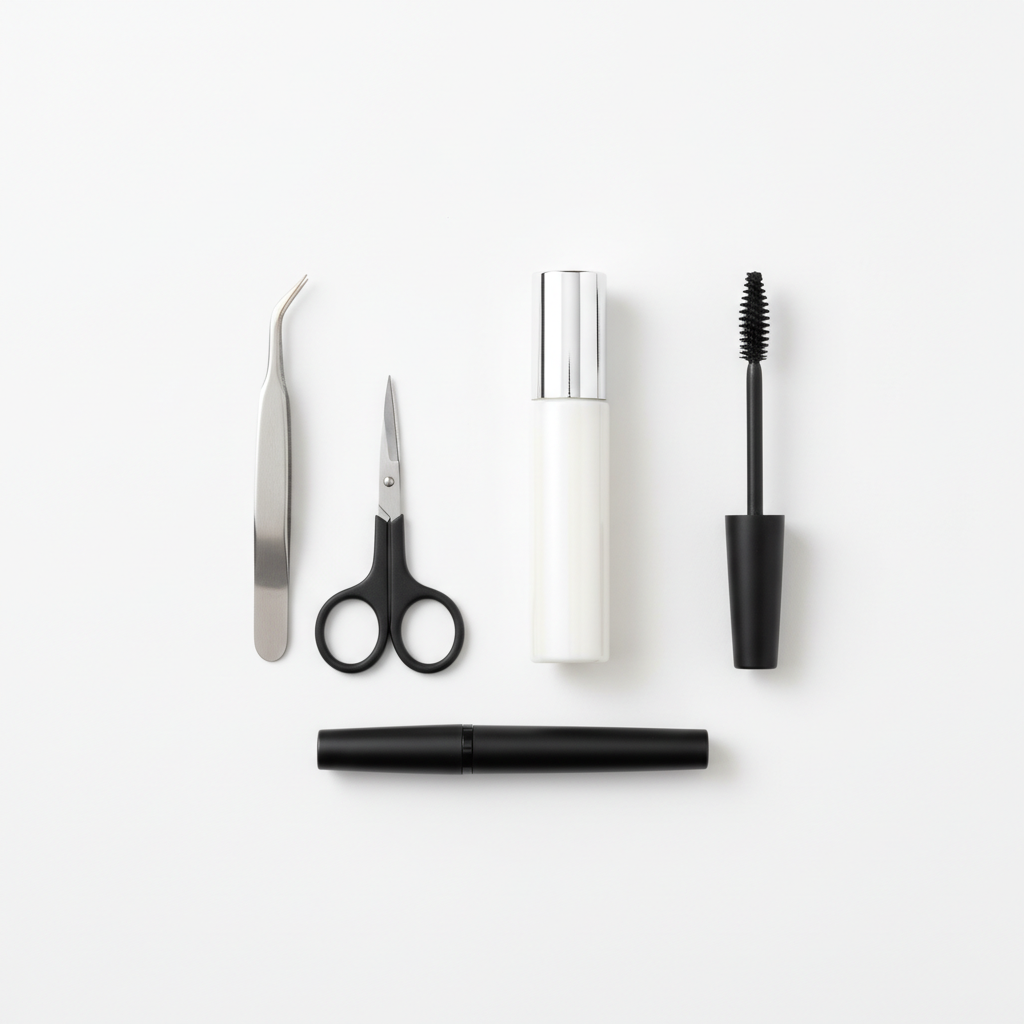
Before you even think about touching a lash, you need the right setup. Good lash glue is non-negotiable (trust me, the cheap stuff will let you down), and having decent tweezers makes everything so much easier. There are also some prep steps that most tutorials skip over—like properly cleaning your lids and trimming lashes to fit your eye. Skip these, and you’ll end up with lifting, sliding, or just plain uncomfortable lashes. Oh, and those common mistakes everyone makes? Like using way too much glue or placing the lash band nowhere near where it should go? We’ll make sure you avoid all of that. If you want to level up your overall makeup game while you’re at it, learning how to use a beauty blender properly can really help tie your whole look together.
What You’ll Learn in This Guide
Ready to become a false lash pro? Here’s exactly what we’re covering:
- Choosing the Right False Eyelashes: Understand the different types of lashes, how to pick one that fits your eye shape, and the look you want to achieve.
- Essential Tools and Products: Discover the must-have items like lash glue, tweezers, and helpful extras that make the application process smooth and effective.
- Step-by-Step Application Process: Follow our detailed instructions from preparation to finishing touches, ensuring your lashes look natural and stay secure all day.
- Common Mistakes and How to Avoid Them: Learn about frequent errors and expert tips to avoid them, boosting your confidence and success with each application.
By the time you finish reading this, you’ll have everything you need to create gorgeous, natural-looking lashes that make you feel confident every single time. Whether you’re starting from scratch or just want to polish your technique, we’ve got you covered.
What I love about this whole process is how quickly you can go from frustrated beginner to someone who can apply lashes with their eyes closed (okay, maybe not literally). We’re going to cover everything—from figuring out which lashes suit your unique features to prepping your eyes the right way. You’ll learn which tools actually matter and which adhesives won’t let you down. Plus, we’ll troubleshoot all those annoying little problems that pop up so you can handle anything.
And while we’re talking about beauty routines, it’s worth knowing how to remove makeup stains from clothes—because let’s be real, sometimes things get a little messy when you’re perfecting your look.
Ready to dive in? Let’s turn you into a false lash expert who can create any look you want, whenever you want it.
False eyelashes? They’re basically magic for your eyes. Seriously—the right pair can take your look from “just okay” to absolutely stunning in minutes. Whether you’re a complete beginner staring at those tiny strips wondering how on earth they’re supposed to stick to your eyelids, or you’ve tried them before but want to nail the technique, you’re in the right place. We’re going to break down everything you need to know: how to pick lashes that actually work for your eyes, and how to apply them without looking like you wrestled with a craft project (and lost).
Choosing the Right False Eyelashes
Here’s the thing about false lashes—they’re not one-size-fits-all. Trust me, I learned this the hard way. The perfect pair depends on your eye shape, what look you’re going for, and honestly, how much patience you have that morning. You’ve got strip lashes (the classic full band), individual lashes (for when you want total control), and magnetic lashes (the newer, less messy option). Each has its place, and figuring out which works for you is half the battle.
Now, if you have hooded eyes, listen up—you’ll want lashes that won’t disappear when you blink. The right technique makes all the difference here, and pairing good lashes with the right makeup approach is key. Check out this guide on how to do makeup for hooded eyes for some game-changing tips. And hey, if you’re feeling overwhelmed or want to see how the pros do it, don’t sleep on finding the best beauty salons near me. Sometimes watching an expert work their magic is worth every penny.
Key Aspects of Choosing False Eyelashes
Let’s get into the nitty-gritty of what you actually need to consider:
- Types of False Eyelashes: Strip lashes are your go-to for drama and speed—one piece, full impact, perfect for beginners who want instant results. Individual lashes? They’re for the perfectionists among us. You can place exactly where you want volume, but they take patience. Magnetic lashes are the cool new kid on the block—no glue mess, just tiny magnets that sandwich your natural lashes. They’re reusable and way less fiddly, though getting the fit right takes some practice.
- Eye Shape Considerations: This is where things get personal. Round eyes look amazing with lashes that focus length on the outer corners—it creates that gorgeous elongated effect. Got almond eyes? Lucky you—pretty much everything works, but don’t go overboard with volume. For hooded eyes, you need lashes with a gentle curve that won’t get lost in your lid fold. The makeup for hooded eyes guide I mentioned earlier? It’s a game-changer for lash placement too.
- Material and Quality: Look, you don’t need to break the bank, but don’t buy the cheapest ones either. Mink lashes feel luxurious and look incredibly natural, while good synthetic fibers can be just as beautiful and more budget-friendly. Quality lashes hold their shape, feel comfortable, and can be reused multiple times. It’s an investment that pays off.
- Occasion and Desired Look: Be honest with yourself here. Are these for your 9-to-5 or Saturday night? Subtle, lightweight lashes work for everyday (and won’t have your coworkers asking if you got extensions). Save the dramatic, voluminous styles for when you really want to make an entrance. Match your lashes to your life, not just your Pinterest board.
Getting your lash selection right sets you up for success. Once you know what works for your eyes and lifestyle, the application becomes so much easier. Ready to actually put these things on? Let’s talk technique.
Step-by-Step Application Process
Okay, real talk—applying false lashes can feel intimidating at first. I’ve seen people break into a sweat just thinking about it. But here’s what I’ve learned: it’s all about prep work and taking your time. Clean eyelids are non-negotiable (oil and lash glue are enemies), and measuring your lashes before you start saves you from the frustration of trying to trim them while balanced on one foot in front of your bathroom mirror.
The right tools make everything easier too. Good tweezers or a lash applicator are worth their weight in gold. And speaking of tools, if you’re working on your overall technique, learning how to use a beauty blender properly can really elevate your whole look. Oh, and let’s be real—you’re going to make some messes while you’re learning. Knowing how to remove makeup stains from clothes might save your favorite shirt more than once.
Key Aspects of the Application Process
Here’s your step-by-step breakdown for lash application that actually works:
- Preparation and Cleaning: Start with squeaky-clean eyelids—any leftover oil or makeup will sabotage your efforts. Measure those lashes against your eye and trim if needed (better to trim too little than too much). This isn’t the time to rush; good prep makes everything else easier.
- Adhesive Application and Timing: Thin line of glue along the band—resist the urge to glob it on. Here’s the secret: wait about 30 seconds for it to get tacky. I know, waiting is hard when you’re excited, but tacky glue grips way better than wet glue. This step alone will change your lash game.
- Precise Placement: Use those tweezers and get as close to your natural lash line as humanly possible. Start in the middle, then work outward—it’s way easier than trying to get the whole thing perfect in one go. If you’re still struggling with placement, the techniques in our eyeliner for hooded eyes guide can help with getting close to that lash line.
- Blending and Finishing: Once they’re secure, blend your natural lashes with the falsies using mascara (if needed). A little eyeliner can hide any visible band and make everything look seamless. This is where those beauty blender skills come in handy for overall blending and a polished finish.

Here’s the thing about false eyelashes—once you get the hang of them, they’ll completely change how you feel about your makeup game. But it all starts with picking the right lashes for your eyes. Round eyes? Almond-shaped? Hooded? Each eye shape has its perfect match, whether you go for dramatic strip lashes, precise individual ones, or those super convenient magnetic options. Trust me, getting this part right makes everything else so much easier.
Now, let’s talk tools. You’re going to need quality eyelash glue (don’t cheap out here), some good tweezers or applicators, and scissors for trimming. The prep work matters too—clean those lids and trim your lashes to fit perfectly. It might seem like extra steps, but it’s what separates a gorgeous application from one that lifts halfway through your day. When you’re ready to apply, remember: thin layer of glue, let it get tacky (this is key!), then place those lashes as close to your natural lash line as possible.
Want to know the biggest mistakes I see? Too much glue and placing lashes too far from the lash line. Both will give you that obvious “fake lash” look nobody wants. Here’s what I’ve learned: patience beats speed every single time. The more you practice, the better you’ll get—and eventually, you’ll be applying them like a pro. Don’t forget about removal either. Be gentle, use the right products, and clean off that adhesive residue. Your lashes (both fake and real) will thank you, and you’ll get way more uses out of each pair.
Ready to take your lash game to the next level? You’ll want to check out our guide on how to do makeup for hooded eyes—it’s packed with tips that work beautifully with false lashes. And if you really want that flawless base to make your eye makeup pop, our tutorial on how to use a beauty blender is a game-changer. Oh, and because we’ve all been there—our guide on how to remove makeup stains from clothes will save you when you’re experimenting with new looks.
Look, mastering false lashes is like learning to ride a bike. Frustrating at first, but once it clicks? You’ll wonder why you ever worried about it. Every time you practice, you’re getting closer to that effortless application that makes people ask, “Are those your real lashes?” (The best compliment, honestly.) So embrace the learning curve, be patient with yourself, and remember—your eyes are already beautiful. We’re just giving them a little extra drama.
Frequently Asked Questions
-
Can I reuse false eyelashes?
- Yes, if they are cleaned and stored properly, false eyelashes can be reused multiple times.
-
How long does eyelash glue take to dry?
- Typically, eyelash glue becomes tacky in about 30 seconds and dries fully within a few minutes.
-
Are false eyelashes safe for sensitive eyes?
- Many false eyelashes and glues are formulated for sensitive eyes, but it’s best to test on a small area first.
-
Can I wear mascara with false eyelashes?
- Yes, applying mascara can help blend your natural lashes with false ones for a seamless look.
-
What should I do if my false eyelash lifts during the day?
- Apply a small amount of glue to the edge and press back into place carefully.
Related Posts

How to Make Your Eyelashes Grow Faster
Complete Nighttime Skincare Routine Steps
