Where to Apply Blush? Expert Tips Inside!
Where to Apply Blush? Expert Tips Inside!
Blush is one of the most transformative makeup products in your beauty arsenal, yet so many people struggle with proper placement. Whether you’re aiming for a natural flush or a bold, sculpted look, knowing exactly where to apply blush can completely change how your face appears. The right blush placement adds dimension, creates a lifted appearance, and brings life back into your complexion—but the wrong placement can make you look tired or costume-like.
In this comprehensive guide, we’ll walk you through everything you need to know about blush application, from finding your perfect placement zones to mastering different techniques for various face shapes. Whether you’re a makeup beginner or someone looking to refine your technique, these expert tips will help you apply blush like a pro.
The Classic Apples of the Cheek Method
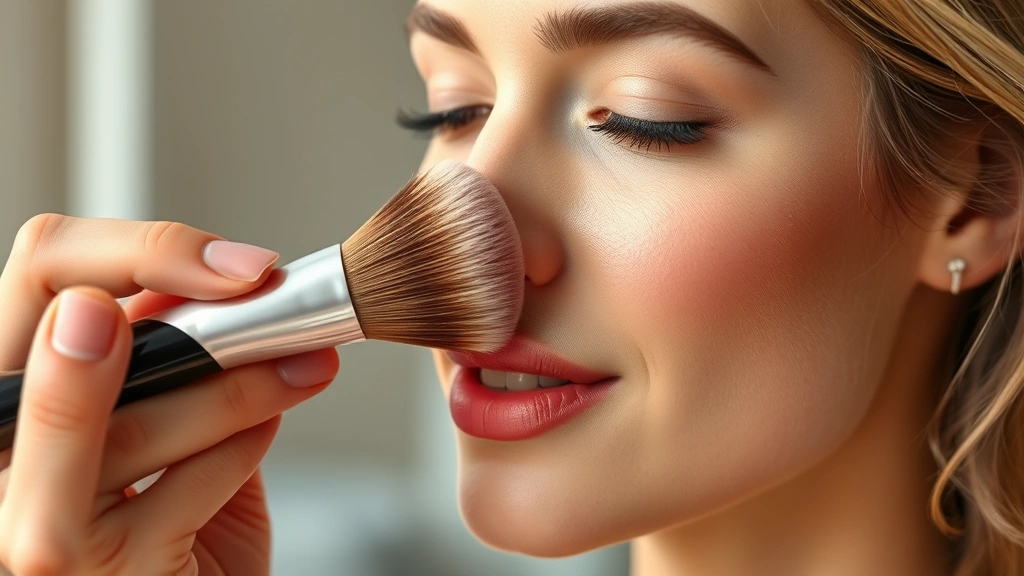
The most foolproof way to find where to apply blush is the “apples of the cheek” method, a technique recommended by professional makeup artists worldwide. This method works because it mimics where natural color appears on your face when you smile or feel flushed.
To use this technique, simply smile broadly and look in the mirror. You’ll notice the apples of your cheeks rise naturally—these are the rounded, fullest parts of your cheeks that protrude when you smile. This is your primary blush zone. Using a fluffy brush with a light hand, apply your blush to this area in circular motions, blending upward toward your temples.
The beauty of this method is its simplicity and universal applicability. It works across all skin tones and face shapes because it’s based on your natural facial anatomy. Start with a light application and build gradually—you can always add more blush, but removing it is much trickier. Most makeup professionals recommend using about one-third of the product you think you need, then assessing before adding more.
When applying to the apples, focus on the fullest part of the cheek and blend the color outward and upward. This creates a natural, youthful appearance that looks like a genuine flush rather than a stripe of color across your face. The key is to make the blush appear as if it’s coming from within your skin rather than sitting on top of it.
Understanding Your Face Shape
While the apples of the cheek method is universally applicable, understanding your specific face shape allows you to customize your blush placement for maximum flattering effect. Different face shapes have different proportions, and strategic blush placement can enhance your best features while subtly balancing less favored areas.
Face shapes are typically categorized as oval, round, square, heart, oblong, and diamond. Each shape has unique characteristics that respond differently to blush placement and blending direction. An oval face is considered the most balanced and can wear almost any blush placement, while rounder faces benefit from blush placement that creates the illusion of more definition.
The placement of your blush can actually create optical illusions that make your face appear more sculpted, lifted, or balanced. When you understand how color and placement work together, you can use blush strategically to enhance your natural features. This is why learning about your specific face shape is so valuable—it transforms blush application from a guessing game into a targeted technique.
Blush Placement for Different Face Shapes
Oval Face Shape: If you have an oval face, you’re in luck! Oval faces are considered the most balanced, so you have the most flexibility with blush placement. You can apply blush to the apples of your cheeks and blend upward, or experiment with the sculpting technique. The key is to avoid placing too much blush too low, which can make an already-long face appear longer.
Round Face Shape: For round faces, the goal is to create definition and the illusion of more prominent cheekbones. Apply blush slightly higher on your cheekbones than you would for other face shapes, and blend it upward and backward toward your ears rather than straight out. This creates a lifting effect and makes your face appear more sculpted. Avoid applying blush too low or too centrally, as this can emphasize the roundness of your face.
Square Face Shape: Square faces have strong jawlines and broad foreheads that benefit from softening. Apply blush to the apples of your cheeks and blend it upward and slightly backward. This draws attention upward and away from the jawline. You might also consider using a slightly warmer or deeper blush tone to add dimension, and make sure your blending is soft and diffused rather than concentrated.
Heart Face Shape: Heart-shaped faces are wider at the forehead and narrower at the chin. To balance this proportion, apply blush to the apples of your cheeks and blend it slightly downward and backward. This draws attention to the lower half of your face and balances the width of your forehead. You might also consider a touch of bronzer along your jawline to add definition.
Oblong Face Shape: Oblong faces are longer and narrower, so you want to avoid emphasizing length. Apply blush slightly lower than the apples of your cheeks and blend it more horizontally (straight out toward your ears) rather than upward. This creates width and makes your face appear more balanced in proportion. Avoid blending blush upward, which can elongate your face further.
Diamond Face Shape: Diamond faces are widest at the cheekbones with a narrow forehead and chin. Apply blush to the apples of your cheeks and blend it upward and slightly backward. You might also add a touch of blush to your temples to balance the width of your cheekbones. Focus on creating a soft, blended appearance rather than sharp lines.
The Sculpting Technique
Once you’ve mastered basic blush placement, the sculpting technique takes your makeup skills to the next level. This advanced method uses blush strategically to create the appearance of more defined cheekbones and a lifted face—even if that’s not your natural bone structure.
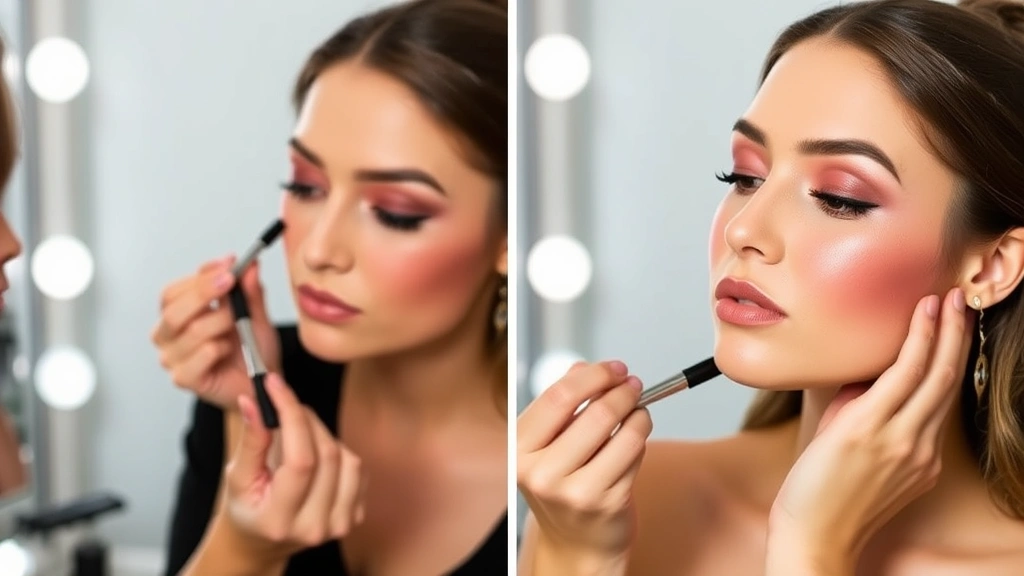
For the sculpting technique, you’ll need two shades: your regular blush shade and a slightly deeper, cooler-toned shade (often called a contour blush or bronzer). Start by applying your regular blush to the apples of your cheeks using the method described above. Then, using a smaller, more precise brush, apply the deeper shade to the hollows of your cheeks.
To find your cheek hollows, suck in your cheeks and look in the mirror. The indentations that appear are your cheek hollows. Apply the deeper shade here, blending it backward toward your ears and slightly upward. This creates shadow and definition, making your cheekbones appear more prominent. The contrast between the lighter blush on the apples and the deeper shade in the hollows creates a sculpted, three-dimensional effect.
This technique requires a lighter hand than basic blush application, as the deeper shade is more concentrated. Start with very little product and build gradually. The goal is to create a subtle shadow that enhances your natural bone structure, not a dramatic stripe of dark color. Blend thoroughly so there are no harsh lines—the transition between your blush and contour should be seamless.
The sculpting technique is particularly effective for creating the illusion of higher, more prominent cheekbones and can make your entire face appear more lifted and defined. Many professional makeup artists use this technique as their go-to method because of how transformative it can be.
Blending Tips for Seamless Application
Proper blending is absolutely crucial for blush application. Even the most beautiful blush shade will look unflattering if it’s not blended properly. Blending takes blush from looking like a stripe of color to looking like a natural flush, and it’s one of the most important skills in makeup application.
Use a fluffy, dome-shaped brush for blending—this type of brush disperses color more evenly than a smaller, more concentrated brush. Apply your blush with a stippling motion (pressing rather than swiping) to deposit color, then use circular motions and feathering strokes to blend the edges. The key is to make the blush gradually fade into your skin rather than having a defined edge.
Blend in the direction you want the color to go. If you want to create a lifted effect, blend upward and backward. If you want a more natural, rounded effect, blend in circular motions. The direction of your blending actually influences how your face appears, so be intentional about it.
One pro tip from professional makeup artists is to blend your blush into areas where you’ve already applied foundation or concealer. Blending onto bare skin can create patchiness. Also, make sure your brush is clean or relatively clean before blending—a brush with too much product on it will move the blush around rather than blending it smoothly.
If you make a mistake or apply too much blush, you can use a clean, fluffy brush or a beauty sponge to gently blend and diffuse the color. Sometimes a light misting with setting spray can also help soften harsh blush lines. Remember that blush should look like it’s glowing from within your skin, not sitting on top of it.
Common Blush Mistakes to Avoid
Even with the best intentions, it’s easy to make blush application mistakes. Being aware of common errors can help you avoid them and achieve a more polished, professional-looking result.
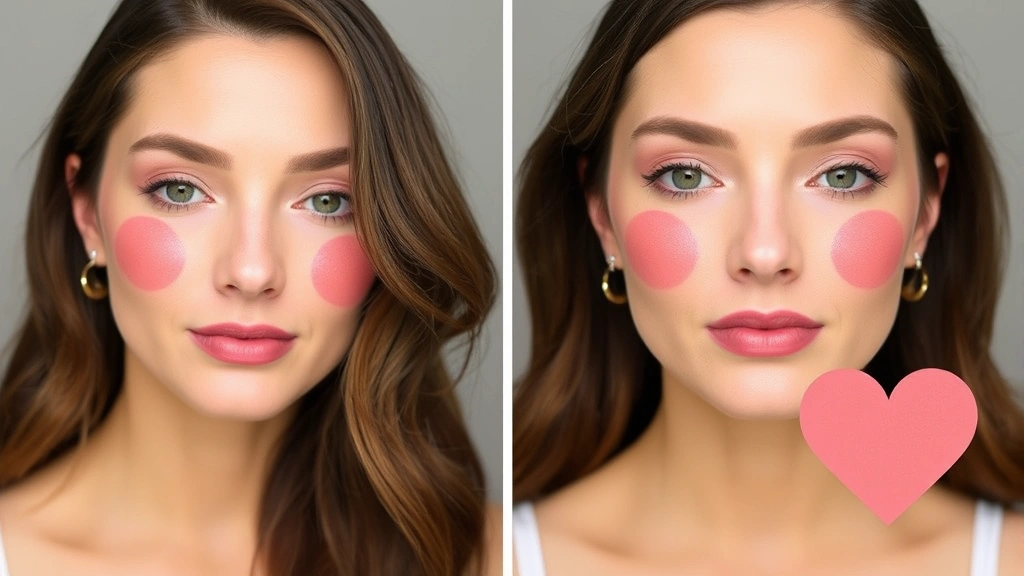
Applying Blush Too Low: One of the most common mistakes is applying blush too low on the face, which can make you look tired or older. Remember to smile and find your cheek apples—this is your guide for proper placement. If your blush is sitting too close to your jawline, it’s too low.
Using Too Much Product: Many people apply far too much blush, which results in an overly dramatic or costume-like appearance. Start with a small amount and build gradually. You can always add more, but removing excess blush is difficult. A light hand is always better than a heavy hand when it comes to blush.
Forgetting to Blend: Blush that isn’t properly blended looks patchy and unnatural. Always take time to blend the edges of your blush thoroughly. Your blush should fade gradually into your skin, not have a defined edge.
Not Considering Your Undertone: Your blush shade should complement your skin’s undertone. If your skin has cool undertones, choose blush shades with pink or berry tones. If your skin has warm undertones, choose blush shades with peach, coral, or warm rose tones. Choosing the wrong undertone can make your complexion look muddy or off.
Applying Blush to Dry Skin: Blush applies more smoothly and blends more easily on properly hydrated, primed skin. Make sure to use a good primer and moisturizer before applying blush. Dry patches will show every flaw in your blush application.
Ignoring Your Face Shape: While the apples of the cheek method works universally, customizing your placement for your face shape creates a more flattering result. Take time to understand your face shape and adjust your blending direction accordingly.
Learning from these common mistakes helps you develop better blush application habits. Even experienced makeup wearers occasionally make these errors, so don’t get discouraged if you do too—just adjust and keep practicing!
FAQ
What’s the best blush brush for application?
A fluffy, dome-shaped brush is ideal for blush application. These brushes allow for better blending and more natural color payoff. Look for brushes with soft, synthetic or natural bristles that won’t irritate your skin. Many makeup artists recommend investing in a high-quality blush brush, as it makes a significant difference in application.
Can I use the same blush placement for both cream and powder blush?
Yes, the placement principles are the same for both cream and powder blush. However, the application technique differs slightly. Powder blush is applied with a brush, while cream blush can be applied with a brush, sponge, or fingertip. Cream blush typically requires a lighter hand, as it can be more concentrated in color.
How do I choose the right blush shade for my skin tone?
The best way to choose a blush shade is to test it on your cheeks in natural light. Your blush should complement your skin’s undertone and look like a natural flush. Fair skin tones often look beautiful in pinks and cool berries; medium skin tones suit warm pinks, corals, and warm roses; deep skin tones are gorgeous with warm reds, berries, and rich plums. Don’t be afraid to experiment!
Should I apply blush before or after bronzer?
Typically, apply blush before bronzer. This allows you to build color gradually and ensures your blush doesn’t get muddy from the bronzer. However, some makeup artists prefer applying bronzer first to create a sculpted base, then adding blush on top. Experiment to see which order you prefer.
How can I make my blush last longer?
Use a good primer before applying blush, and set your blush with a light setting spray or powder. Primers help blush adhere better to your skin, while setting products lock everything in place. Make sure your skin is properly hydrated and moisturized, as blush applies and lasts better on well-prepped skin.
Is it okay to use blush as an eyeshadow?
Many blush shades work beautifully as eyeshadow, especially cream blushes or sheer powder formulas. However, not all blush is formulated for use near the eye area, so check the product label. Cream blush typically works better as eyeshadow than powder blush, which can be more difficult to blend on the eyelid.
Related Posts
Perfect Old Fashioned Donut: Baker’s Secrets
Old Fashioned Chocolate Pie Recipe? Chef’s Favorite
