
Smokey Eye Look Tutorial? Makeup Artist Tips
Smokey Eye Look Tutorial: Professional Makeup Artist Tips & Techniques
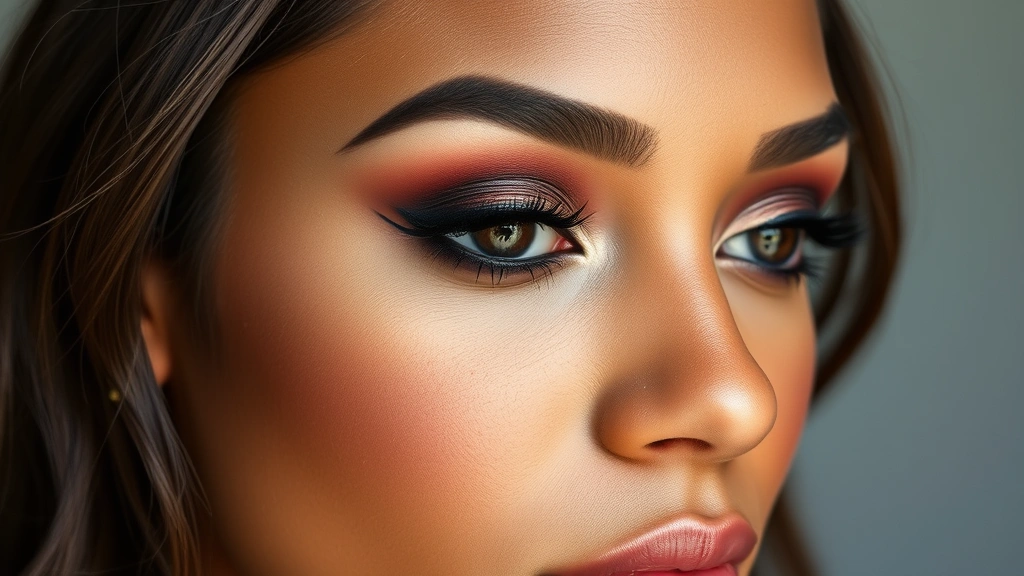
The smokey eye is the ultimate classic makeup look that never goes out of style. Whether you’re preparing for a night out, a special event, or simply want to elevate your everyday makeup routine, mastering this sultry technique is essential. A well-executed smokey eye can instantly transform your appearance, adding depth, dimension, and drama to your gaze. This comprehensive guide will walk you through every step of creating a flawless smokey eye, complete with professional makeup artist insider tips and tricks.
What makes the smokey eye so universally appealing is its versatility. You can create soft, romantic versions for daytime wear or intensely dramatic looks for evening events. The beauty of this technique lies in blending—the art of seamlessly transitioning between multiple shades to create that signature smudged, hazy effect. Professional makeup artists have perfected this skill over years of practice, and we’re here to share their secrets with you.
Understanding the Smokey Eye Basics
Before diving into application, it’s crucial to understand what defines a smokey eye. At its core, this look features a gradient of neutral to dark eyeshadow that transitions from light to deep, creating a dimensional effect. The technique involves layering multiple shades, with darker colors concentrated on the eyelid and gradually becoming lighter toward the brow bone. This creates the illusion of depth and makes the eyes appear larger and more defined.
Professional makeup artists emphasize that the key to a successful smokey eye is understanding color theory and how different shades interact. Warm undertones pair beautifully with bronze and copper shades, while cool undertones shine with silvers and grays. The beauty of the smokey eye is that it works across all skin tones—from fair to deep—you simply adjust your shade selection accordingly.
The smokey eye technique has evolved significantly from its origins. What started as a bold, theatrical look has become a staple in everyday makeup routines. Today’s versions range from subtle and wearable to intensely dramatic, making it accessible for everyone. Understanding this evolution helps you appreciate the technique’s versatility and adapt it to your personal style.
Essential Products and Tools
Creating a flawless smokey eye requires the right arsenal of products and tools. Professional makeup artists invest in quality items because they make a significant difference in the final result. Here’s what you’ll need:
- Eyeshadow Primer: This is non-negotiable. A good primer ensures your eyeshadow stays put throughout the day and prevents creasing. Look for long-wearing formulas that create a smooth canvas for application.
- Eyeshadow Palette: Invest in a palette with multiple complementary shades. A typical smokey eye palette includes light transition shades, mid-tone colors, and deep, dark shadows. Palettes from reputable brands offer better pigmentation and blendability.
- Brushes: Quality brushes are essential. You’ll need a fluffy blending brush for transition shades, a flat shader brush for packing color onto the lid, and a smaller pencil brush for detailed work and the lower lash line.
- Eyeliner: Black or dark gray pencil eyeliner defines the eye and adds dimension to the smokey effect.
- Mascara: A volumizing mascara completes the look by adding drama and opening up the eye.
- Setting Spray: To ensure longevity, use a makeup setting spray designed to lock everything in place.
Makeup artists often recommend investing in brushes first, as they significantly impact your ability to blend and apply color smoothly. Synthetic brushes work well for cream products, while natural hair brushes excel with powder formulas. Having the right tools transforms your application experience and results.
When selecting products, consider visiting a beauty counter where professionals can help you choose shades that complement your specific skin tone and undertones. This personalized approach often yields better results than shopping online alone.
Step-by-Step Application Guide
Now let’s walk through the actual application process. Professional makeup artists follow a systematic approach that ensures consistent, beautiful results every time.
Step 1: Prime Your Eyelids
Start with a clean, moisturized face. Apply eyeshadow primer across your entire eyelid and up to your brow bone. This creates an adhesive base that prevents creasing and helps colors stay vibrant throughout the day. Allow the primer to set for about 30 seconds before proceeding.
Step 2: Apply the Transition Shade
Using your fluffy blending brush, apply a light, neutral transition shade across your entire eyelid and into your crease. This shade should be close to your skin tone or slightly lighter. This step is crucial because it creates a smooth foundation for the darker shades and helps them blend seamlessly. Makeup artists emphasize this step because it prevents harsh lines and creates dimension.
Step 3: Apply the Mid-Tone Shade
Select a medium brown or taupe shade and apply it to your eyelid using a flat shader brush. Use windshield wiper motions to blend this shade into the transition color. This mid-tone bridges the gap between light and dark, creating a gradient effect. Professional artists often apply this shade with a light hand initially, then build intensity gradually.
Step 4: Deepen with Dark Shadow
This is where the drama happens. Using a smaller blending or pencil brush, apply your darkest shade—typically black, charcoal, or deep brown—to the outer corner of your eye and into the crease. Use a windshield wiper motion, concentrating the darkest color at the outer corner and gradually fading it inward. This creates the characteristic smokey effect.
Step 5: Define the Lower Lash Line
Using a pencil brush and your dark shadow, define the lower lash line. This adds definition and extends the smokey effect downward, creating a cohesive look. You can also use black eyeliner pencil for this step for more precision.
Step 6: Highlight the Inner Corner
Apply a light, shimmery shade to the inner corner of your eye to brighten and open up the eye. This creates contrast with the darker outer areas and prevents the look from appearing too heavy.
Step 7: Line and Finish
Apply black or dark eyeliner to your upper lash line, then finish with volumizing mascara on both upper and lower lashes. This completes the dramatic effect and ties everything together.
Advanced Blending Techniques
Blending is where the magic happens in a smokey eye, and professional makeup artists spend considerable time perfecting this skill. Here are advanced techniques that elevate your application:
The Windshield Wiper Technique: This fundamental blending method involves moving your brush back and forth across the crease in a windshield wiper motion. The movement helps colors blend seamlessly without creating harsh lines. Professional artists use this technique with light pressure, building color gradually rather than applying heavy amounts initially.
Circular Motions: For softer blending, try circular motions with your blending brush. This technique works particularly well when transitioning between similar shades or softening edges that appear too defined.
Stippling Method: Gently tapping your brush onto the eyelid—rather than swiping—helps blend colors without disturbing previously applied layers. This technique is especially useful when you need to add more color to a specific area without disrupting the gradient you’ve already created.
Layering Strategy: Professional makeup artists build their smokey eye in layers, applying thin coats of color rather than one heavy application. This approach gives you more control and allows for easier blending. If you make a mistake, you can correct it before adding more product.
The key to mastery is practicing these techniques regularly. Many makeup artists recommend practicing on days when you’re not going out, so you can experiment without pressure. Over time, your muscle memory develops, and blending becomes second nature.
Color Variations and Customization
While the classic smokey eye features neutral and black shades, modern interpretations include various color combinations. Understanding how to customize this look ensures it complements your features and personal style.
Warm Smokey Eye: For warm undertones, incorporate bronze, copper, and warm brown shades. These colors create a sophisticated, earthy look that’s perfect for autumn events or everyday wear. The warmth of these shades complements golden undertones in skin beautifully.
Cool Smokey Eye: Gray, silver, and cool-toned taupe create a sophisticated, modern look. This variation works beautifully on cool undertones and creates a sleek, contemporary aesthetic. Purple and blue undertones can also be incorporated for a more creative interpretation.
Jewel-Tone Smokey Eye: For those wanting more drama, jewel tones like emerald, sapphire, or amethyst can replace traditional neutral shades. These colors create a stunning smokey effect while adding personality and uniqueness to your look.
Monochromatic Smokey Eye: Using different depths of the same color family creates a cohesive, polished appearance. This approach is elegant and works particularly well for formal events.
When customizing your smokey eye, consider your eye color. Warm browns and bronzes make blue eyes pop, while cool silvers and purples complement brown eyes. Green eyes often look stunning with copper or bronze tones. Professional makeup artists always consider these color relationships when recommending shades to clients.
Additionally, consider your sustainable fashion choices when selecting makeup brands—many now offer eco-friendly eyeshadow palettes that perform beautifully while supporting environmental responsibility.
Common Mistakes to Avoid
Even experienced makeup enthusiasts sometimes make errors that compromise their smokey eye. Here are common pitfalls and how to avoid them:
Over-Blending: While blending is essential, over-blending can create a muddy, undefined appearance. Professional makeup artists know when to stop blending and let colors sit. If your smokey eye looks too blended and murky, you’ve likely overdone it.
Insufficient Primer: Skipping or under-applying primer is a common mistake. Without proper primer, eyeshadow creases, fades, and doesn’t blend smoothly. Always apply a generous layer of quality primer.
Using Dry Brushes: Dry brushes don’t pick up enough product and don’t blend smoothly. Professional artists dampen their brushes slightly with setting spray or use cream products to enhance blending capabilities.
Neglecting the Lower Lash Line: The smokey eye extends below the eye. Ignoring the lower lash line creates an incomplete look. Always define this area to create a cohesive appearance.
Poor Color Selection: Choosing shades that don’t complement your undertone can result in an unflattering look. Take time to find shades that work with your specific skin tone.
Applying Too Much Product: More product doesn’t equal better results. Professional makeup artists apply thin layers, building intensity gradually. This approach gives you more control and prevents heavy, cakey appearance.
Forgetting to Set: Without setting spray, your carefully blended smokey eye won’t last. Always finish with a quality setting spray to lock everything in place and ensure longevity throughout the day.
Learning from these common mistakes accelerates your skill development and helps you create beautiful smokey eyes consistently.

Longevity and Setting Tips
A stunning smokey eye means nothing if it doesn’t last throughout your day or evening. Professional makeup artists have developed techniques to ensure your look stays fresh and beautiful:
Invest in Quality Primer: As mentioned earlier, primer is foundational. Quality primers create a barrier between your skin and eyeshadow, preventing oils from breaking down your makeup. This single product can extend the wear time of your smokey eye significantly.
Use Setting Spray: After completing your smokey eye, lightly mist your entire face with setting spray. This locks all your hard work in place and creates a protective seal. Professional makeup artists use setting spray on all their clients, regardless of skin type.
Consider Waterproof Formulas: For events where you might encounter humidity, tears, or water, waterproof eyeshadow and eyeliner formulas are game-changers. These products resist moisture and maintain their appearance throughout challenging conditions.
Pack Blotting Papers: Throughout the day, oil may accumulate on your eyelids. Gently blotting with blotting papers removes excess oil without disturbing your makeup. Avoid rubbing, which can smudge your carefully applied look.
Keep Touch-Up Products Handy: Professional makeup artists recommend carrying a small eyeshadow brush and your darkest shade for quick touch-ups. If any fading occurs, a quick swipe with your brush refreshes the look instantly.
Avoid Touching Your Eyes: As obvious as it sounds, touching your eyes throughout the day disrupts your makeup. Be mindful of this habit to maintain your smokey eye’s integrity.
Sleep Properly: If you’re wearing your smokey eye overnight (not recommended for regular practice), use a silk pillowcase to minimize friction and prevent smudging. Ideally, remove makeup before sleeping to maintain healthy skin.
For more information on sustainable makeup practices and environmental considerations, explore resources on Byrdie Beauty, which offers comprehensive makeup tutorials and product recommendations.
FAQ
How long does it take to create a smokey eye?
Professional makeup artists typically spend 10-15 minutes creating a smokey eye once they’ve mastered the technique. Beginners may take 20-30 minutes initially, but with practice, application time decreases significantly. The key is not to rush—quality blending takes patience.
Can I create a smokey eye with a limited color palette?
Absolutely! You don’t need an extensive palette. Three shades—a light transition color, a mid-tone, and a dark shade—are sufficient to create a beautiful smokey eye. Many professional makeup artists work with minimal palettes and achieve stunning results through skillful blending and technique.
Is the smokey eye appropriate for daytime wear?
Yes! While the smokey eye is often associated with evening looks, a softer, more neutral version works beautifully for daytime. Use lighter, more muted shades and less intense blending for a wearable daytime version. Professional makeup artists frequently create subtle smokey eyes for professional settings and casual events.
What’s the best way to remove smokey eye makeup?
Use a gentle makeup remover or cleansing oil to dissolve the eyeshadow. Avoid harsh rubbing around the delicate eye area. Professional makeup artists recommend using makeup remover wipes or liquid cleansers specifically formulated for eye makeup removal. Follow with a gentle cleanser to remove any residue.
Can I create a smokey eye with cream eyeshadow?
Yes! Cream eyeshadows blend beautifully and often provide better pigmentation than powders. However, you’ll need to set cream products with powder eyeshadow to prevent creasing. Many professional makeup artists prefer cream formulas for their blendability and long-wearing properties.
How do I prevent my smokey eye from looking muddy?
The key is not over-blending and choosing complementary shades. Ensure adequate contrast between your light and dark shades. Professional makeup artists recommend using shades from the same color family but different depths. Additionally, avoid mixing too many colors—stick to 3-4 shades maximum.
What undertones work best for smokey eyes?
All undertones can rock a smokey eye—it’s about choosing the right shades. Warm undertones look stunning with bronze and warm browns, while cool undertones shine with silvers and cool taupes. Understanding your undertone helps you select shades that enhance your natural coloring and create a cohesive, flattering look.
Related Posts

Perfect Old Fashioned Donut: Baker’s Secrets
Old Fashioned Chocolate Pie Recipe? Chef’s Favorite
