Regency Makeup Tips: Expert Insights
Regency Makeup Tips: Expert Insights for Period-Perfect Beauty
The Regency era, spanning from 1811 to 1820, represents one of the most elegant and refined periods in fashion history. During this time, makeup aesthetics reflected a philosophy of understated luxury and natural-looking beauty that contrasts sharply with the heavy cosmetics of the Victorian era that followed. Understanding Regency makeup requires diving into the historical context, available ingredients, and the specific beauty standards that defined this sophisticated period.
Whether you’re a historical reenactor, costume enthusiast, or simply fascinated by period beauty, mastering Regency makeup techniques will transport you back to the era of Jane Austen and Romantic elegance. This comprehensive guide explores the expert insights, authentic products, and application methods that will help you achieve that coveted Regency glow.
The Philosophy Behind Regency Beauty Standards
The Regency period celebrated a distinctly different aesthetic from what came before and after. Rather than the dramatic, heavily painted faces of the Georgian era or the pale, ghostly appearance preferred during the Victorian age, Regency beauty embraced a “natural” look that actually required considerable skill to achieve. The ideal was a fresh-faced, youthful appearance with a rosy complexion that suggested health, vitality, and outdoor activity.
This philosophy was deeply connected to Romantic ideals that emphasized nature, sensibility, and authenticity. Women were encouraged to appear as though they had barely touched their faces with cosmetics, even though the reality involved careful application of various products. The term “natural” during this period meant something quite different from modern interpretations—it was about creating an appearance of effortless beauty rather than avoiding makeup altogether.
Regency beauty standards also reflected the social values of the time. A woman’s appearance should suggest good breeding, health, and virtue. The makeup should enhance her natural features without appearing obvious or theatrical. This required understanding which products to use, how much to apply, and which techniques would create that coveted “I woke up like this” effect that was paradoxically very intentional.
Essential Regency Makeup Products and Ingredients
Understanding what was actually available during the Regency period is crucial for authentic recreation. The cosmetics industry was far less regulated than today, and products were often made from natural ingredients that we now know to be questionable in terms of safety. However, for the purposes of achieving an authentic look, knowing the traditional formulations helps us select modern alternatives that replicate the effects.
Foundations and Bases: During the Regency era, women used products like Gowland’s Lotion, a lead-based preparation that created a white cast on the skin. Rather than modern foundations, they relied on various creams, oils, and powders. Modern beauty blogs often discuss how to adapt historical recipes for contemporary use. Today’s cream foundations or BB creams in very light shades can replicate this effect authentically.
Powders: Rice powder was the powder of choice during the Regency period, applied to set the base and create a matte finish. Some formulations included bismuth, which created a luminous quality. Modern translucent powders or rice-based powders work excellently for achieving this historical effect.
Colorants: Carmine, derived from cochineal insects, provided the primary red pigment for lips and cheeks. This natural colorant created a warm, slightly blue-toned red that’s distinctly different from modern orange-based reds. Ochres and iron oxides provided earth-toned shades. Modern makeup artists often use cream blushes and lip tints in berry and mauve tones to approximate historical colors.
Eye Products: Kohl and charcoal were used for defining eyes, though sparingly. Crushed minerals provided shimmer and color. Eyeshadow during this period was minimal—the focus was on the brows and lashes rather than elaborate eye color.
Foundation and Base Application Techniques
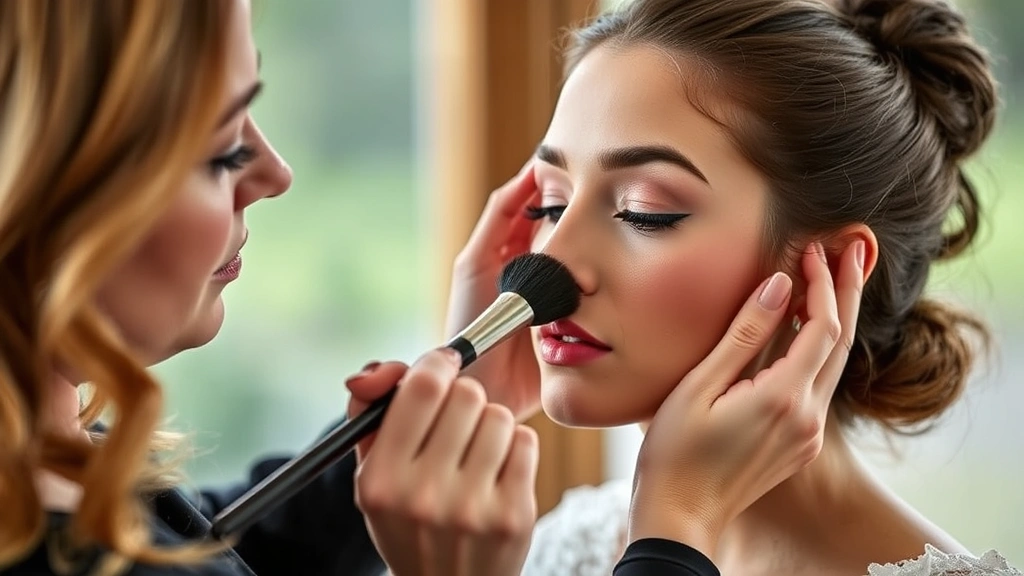
Creating an authentic Regency base begins with understanding that the goal is an even, luminous complexion that appears poreless and smooth. The modern equivalent of Regency base application involves several steps that build to create that characteristic appearance.
Step One: Skin Preparation Start with well-moisturized skin. Regency makeup sat atop skin that was treated with various oils and creams. Apply a hydrating primer or a light facial oil to create a smooth canvas. This helps the makeup glide on and prevents that modern “matte” appearance that would have looked wrong during this period.
Step Two: Foundation Selection Choose a cream or liquid foundation in a shade that’s slightly lighter than your natural skin tone. This mimics the whitening effect of historical preparations without using anything harmful. Apply with a damp sponge or brush, focusing on creating an even base across the face. The Regency ideal was a completely unified complexion with no visible texture.
Step Three: Concealing and Evening Use a concealer slightly lighter than your foundation to brighten the under-eye area and any areas that need additional coverage. Blend carefully to avoid visible lines. The goal is a seamless, almost porcelain-like finish.
Step Four: Powder Application This is where the Regency look truly comes together. Apply a translucent or very light-tinted powder with a large, fluffy brush. Use a pressing motion rather than sweeping to avoid disturbing the base. Focus on the T-zone and areas prone to shine. The powder should create a soft-focus, slightly matte finish that still appears luminous rather than flat.
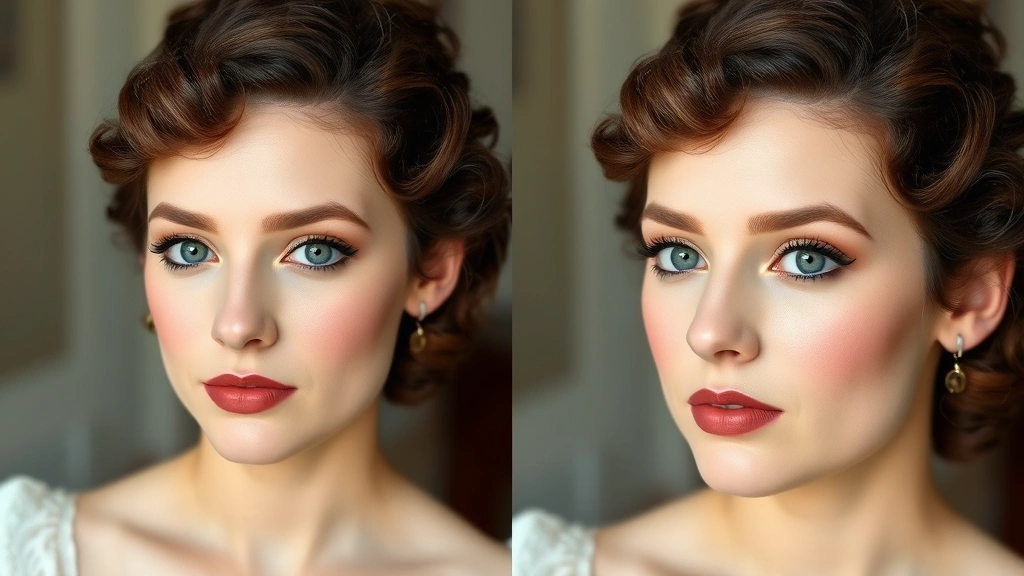
Creating the Perfect Regency Complexion
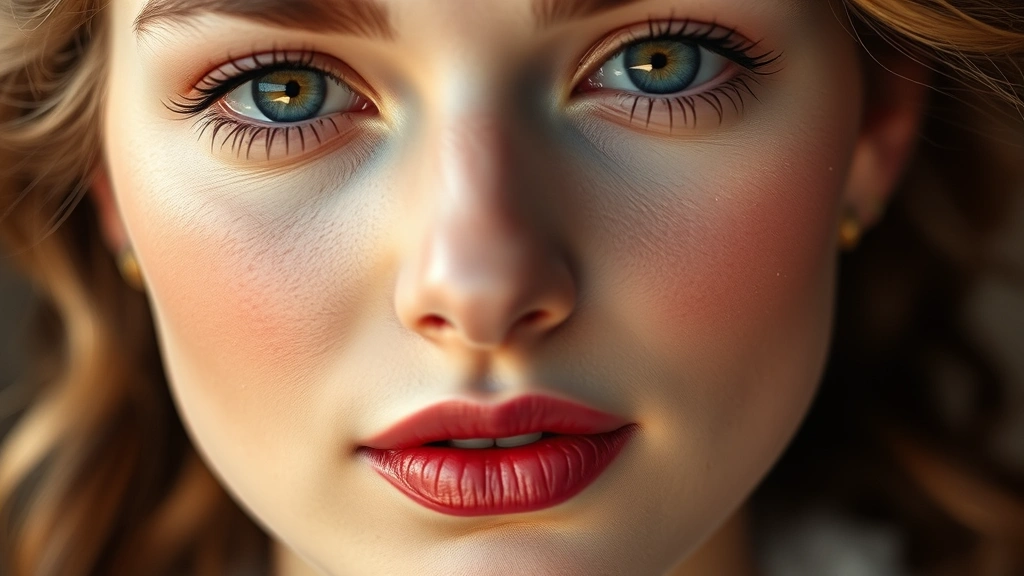
The Regency complexion was characterized by several distinctive features: a pale but rosy base, strategically placed color, and an overall appearance of dewy health. According to historical fashion research, this look was achieved through careful color placement and blending.
Begin with your powdered base and assess your skin tone. If your natural complexion is too warm or too pink, you may need to apply a very light, cool-toned powder over the areas you want to appear paler. The goal is an almost ethereal quality—think of the pale, luminous complexions in Regency-era portraits.
Next, focus on creating dimension without obvious contouring. Apply a cream blush in a soft rose or mauve tone to the apples of your cheeks. Blend upward and backward toward the temples, but keep the color concentrated in the center of the face. The blush should appear as if it’s a natural flush rather than makeup, suggesting the rosy cheeks of a healthy, active young woman.
Consider adding a very subtle highlight to the cheekbones, brow bones, and the tip of the nose. During the Regency period, women used products that created a subtle glow rather than the obvious shine of modern highlighters. A luminous powder applied sparingly to these areas creates an authentic effect.
Color Correction Tips: If your complexion has redness or uneven patches, address these with color-correcting products before applying foundation. The Regency ideal was a completely smooth, even complexion, so these preparatory steps are essential for authenticity.
Eye Makeup for the Regency Period
The Regency eye makeup approach differs significantly from modern techniques. Rather than emphasizing eyeshadow or dramatic eye looks, the focus was on defining the eye shape with minimal color and maximum emphasis on the brows and lashes.
Eyeliner Application: A soft kohl or charcoal eyeliner applied close to the upper lash line subtly defines the eye without creating obvious makeup. Apply a very thin line, keeping it close to the lashes. Some sources suggest a barely-there line that simply enhances the natural eye shape. Avoid winged or graphic liner—Regency eyes were about subtle enhancement.
Eyeshadow Considerations: Minimal eyeshadow was used during this period. If applied at all, it was in neutral, earthy tones—soft browns, taupes, or very subtle golds. A light wash of color across the lid can add dimension without appearing obviously made up. Keep eyeshadow matte or very subtly shimmery, avoiding the frosted or glittery finishes that would have looked wrong during this era.
Lash Enhancement: Since mascara didn’t exist during the Regency period, women used various methods to darken and define their lashes. Modern mascara in black or dark brown applied to the upper lashes only creates an authentic effect. Apply mascara to the upper lashes with a light hand, curling them slightly for a natural lift. Avoid the lower lashes or apply very minimally.
Eyebrow Shaping: Beauty professionals note that Regency eyebrows were typically kept relatively full and natural, with a soft arch. The brows should appear barely shaped, following the natural bone structure of the brow ridge. Use a soft, warm brown brow product to fill in any sparse areas, maintaining a soft, natural appearance. The goal is brows that frame the eye without drawing obvious attention to themselves.
Lips and Cheeks: The Art of Subtle Color
Lip color during the Regency period was one of the few places where women could show obvious color, yet even this was meant to appear subtle and natural. The preferred lip color was a soft, warm red with slightly blue undertones—what modern makeup artists might describe as a berry or mauve-red rather than a true scarlet.
Lip Color Selection: Choose a cream or satin finish lip color rather than matte. The finish should appear natural and slightly glossy, as if the lips are just naturally pigmented. Apply with a lip brush for precision, keeping the color within the natural lip line. Avoid overlining the lips or creating obvious definition—the Regency lip was about subtle enhancement.
Lip Application Technique: Start at the center of the upper lip and work outward, following the natural contour. For the lower lip, apply color to the center and blend outward. The result should appear as if you have naturally rosy, well-pigmented lips rather than obviously painted ones. A light dab of gloss or balm over the color adds the dewy quality that was desirable during this period.
Cheek Color Integration: The cheeks and lips should work together harmoniously. If using a berry-toned lip, select a slightly softer, more muted version of that same color family for the cheeks. This creates a cohesive, natural-looking flush rather than obvious makeup application. Cosmetic dermatology research suggests that color harmony across the face creates a more polished, intentional appearance.
Eyebrows and Overall Face Shaping
The eyebrows played a crucial role in the Regency face, framing the eyes and contributing to overall facial expression. Unlike some historical periods where eyebrows were plucked nearly off or dramatically shaped, the Regency preferred a more natural brow line.
Natural Arch Philosophy: Rather than creating a severe arch, Regency eyebrows followed the natural bone structure with only subtle shaping. The arch should be soft and gradual, creating a gently lifted appearance rather than a dramatic angle. This complements the overall philosophy of appearing naturally beautiful rather than heavily made up.
Brow Maintenance: Keep eyebrows full through the inner two-thirds of the brow, with a gradual taper toward the tail. Any plucking should be minimal, focusing only on stray hairs below the natural brow line. The goal is brows that appear untouched and natural, even if they’ve been carefully shaped.
Face Shaping without Contouring: Modern contouring would have been completely foreign to Regency makeup practices. Instead of creating dimension through shadow and highlight, focus on strategic color placement. The soft blush placement and subtle use of powder creates natural-looking dimension without the obvious sculpting of contemporary techniques.
Hair and Makeup Integration
Authentic Regency makeup cannot be separated from the hairstyles of the period. The makeup was designed to complement the hair and overall silhouette, creating a cohesive look.
Hairstyle Considerations: Regency hairstyles typically featured hair gathered up and away from the face, often with curls framing the face or arranged on top of the head. This exposed the face significantly, making makeup application and quality all the more important. The makeup should be flawless and well-blended since it’s on full display.
Forehead and Temple Area: With hair pulled back, the forehead and temples are prominent features. Ensure your base extends fully to these areas and is evenly blended. The temples should have the same luminous quality as the rest of the face. Some women during this period applied a very subtle highlight to the temples to enhance the lifted, youthful effect created by the hairstyle.
Neck and Décolletage: Regency fashion often featured low necklines that exposed the neck, shoulders, and upper chest. Your foundation should extend to these areas and blend seamlessly. The neck should appear as a natural continuation of the face color, creating an unbroken line from face to chest. Apply powder to these areas as well to create a unified, matte finish.
Coordination with Clothing: While makeup itself didn’t change dramatically based on clothing, understanding the overall aesthetic helps with product selection. The soft, romantic quality of Regency makeup complements the high waistlines, flowing fabrics, and delicate details of period clothing. Your makeup should appear equally refined and intentional.
FAQ
What was the most important aspect of Regency makeup?
The most crucial element was creating an appearance of natural beauty—a fresh, healthy complexion with subtle color that suggested the wearer had barely touched her face with cosmetics. This required significant skill despite appearing effortless. The pale but rosy complexion achieved through careful base work and color placement was the foundation of the entire look.
Can I achieve an authentic Regency look with modern makeup products?
Absolutely. Modern cream foundations, powders, blushes, and lip tints can be selected and applied to create an entirely authentic Regency appearance. The key is understanding the philosophy behind the look and choosing products in appropriate colors and finishes. You don’t need historical products to achieve historical accuracy in appearance.
Were eyebrows shaped differently during the Regency period?
Regency eyebrows were kept relatively natural and full compared to some other historical periods. While they were shaped to follow the bone structure and maintain a soft arch, they were never plucked dramatically or shaped into severe lines. The goal was brows that appeared almost untouched.
How much makeup was typically worn during the Regency period?
While the philosophy was “natural” beauty, Regency women actually wore quite a bit of makeup—it was just applied skillfully to appear minimal. The base was carefully constructed, powder was applied liberally, and color was strategically placed. The difference from modern makeup is in the quality of blending and the avoidance of obvious color or texture.
What lip color should I use for an authentic Regency look?
Choose a cream or satin-finish lip color in a soft red with slightly blue undertones—essentially a berry or mauve-red rather than orange-based reds. The finish should appear natural and slightly glossy, suggesting well-pigmented lips rather than obviously painted ones. Apply with restraint, keeping color within the natural lip line.
Is contouring appropriate for Regency makeup?
Modern contouring techniques would be completely inappropriate for an authentic Regency look. Instead, focus on strategic color placement with soft blush and subtle highlighting to create dimension. The overall effect should be soft, blended, and natural-looking rather than sculpted or obviously shaped.
How do I blend my Regency makeup to avoid visible lines?
Use damp beauty sponges or soft brushes and blend thoroughly at all boundaries. Cream products blend more easily than powders, so consider using cream blush before setting with powder. Take time with the foundation and concealer blending, ensuring no visible demarcation lines. The final powder application should be diffused with a large, fluffy brush to create a seamless finish.
What should I do if my skin tone doesn’t match the pale Regency ideal?
You can select a foundation shade that’s slightly lighter than your natural skin tone to approximate the historical whitening effect. Alternatively, apply a cool-toned powder over warmer areas to create a more unified, pale appearance. The goal is evening out your complexion and creating that characteristic Regency glow rather than matching a specific skin tone, as beauty standards have evolved significantly.
Related Posts
Perfect Old Fashioned Donut: Baker’s Secrets
Old Fashioned Chocolate Pie Recipe? Chef’s Favorite
