Old Fashioned Look? Makeup Tips from the Past
Vintage makeup looks are having a major moment, and for good reason. There’s something timeless and elegant about recreating the beauty trends of decades past. Whether you’re drawn to the bold winged eyeliner of the 1950s, the dramatic eyes of the 1970s, or the dewy skin of the 1920s, mastering old-fashioned makeup techniques can elevate your entire beauty routine. These classic approaches aren’t just nostalgic—they’re rooted in proven techniques that flatter nearly every face shape and skin tone.
The beauty of studying vintage makeup is that it teaches us fundamental principles that transcend trends. When you understand how to apply makeup the old-fashioned way, you develop skills that make you a more versatile makeup artist. You’ll learn about color theory, face sculpting, and the importance of precision that modern makeup sometimes glosses over. This guide will walk you through the essential techniques and products you need to achieve authentic vintage looks.
Understanding Vintage Makeup Eras
Each decade brought distinct makeup philosophies and techniques. The 1920s flapper era emphasized dramatically darkened eyes with thin, arched eyebrows and pale skin. This rebellious look was a stark contrast to the natural beauty ideals that preceded it. Women used kohl pencils to create bold eye definitions and often wore their makeup with theatrical flair.
The 1940s introduced a more structured approach, with emphasis on sculpted cheekbones and defined lips. This era valued symmetry and precision, using cream-based products that allowed for seamless blending. The 1950s brought us the iconic winged eyeliner and full, glossy lips paired with soft, feminine eyeshadow in pastels and neutrals.
The 1960s revolutionized eye makeup with the introduction of mod styles—think heavy black eyeliner, false lashes, and stark white eyeshadow on the inner eye. The 1970s embraced earthier tones, cream eyeshadows, and a more natural approach to base makeup. Understanding these different historical periods helps you choose which vintage aesthetic resonates with your personal style.
Skincare Foundation for Timeless Beauty
Vintage makeup artists understood that great makeup begins with great skin. Unlike modern approaches that sometimes rely heavily on coverage, old-fashioned techniques emphasized skincare as the true foundation. Before any makeup application, dermatologists and beauty experts recommend establishing a solid skincare routine.
Start with a gentle cleanser appropriate for your skin type, followed by a hydrating toner or essence. Apply a lightweight moisturizer that suits your skin’s needs—vintage makeup actually sits better on well-hydrated skin. Many beauty professionals from classic eras used facial oils and rich creams as their primary moisturizers, which created that coveted dewy finish.
The concept of how different factors interact applies to skincare too—your environment, climate, and seasonal changes all affect how vintage makeup products perform on your skin. Allow your skincare to set for a few minutes before applying primer, creating the perfect canvas for vintage-inspired makeup.
Classic Base and Complexion Techniques
The foundation application in vintage makeup differed significantly from modern methods. Rather than full coverage, classic techniques used lighter application with strategic highlighting and contouring. Vintage makeup artists often used cream foundations or stick foundations applied with fingertips or natural sponges for a seamless, skin-like finish.
To achieve this look, apply foundation only where needed—typically the center of the face and areas that need coverage. Blend outward toward the jawline and temples, leaving some skin showing through for a natural appearance. Set with a light powder, but avoid over-powdering, which was a common mistake in vintage makeup application.
Contouring in vintage makeup was subtle. Rather than the dramatic sculpting we see today, classic techniques used warm, earthy tones to add dimension. Apply a slightly deeper tone in the hollows of your cheeks, along the sides of your nose, and around the jawline. Blend thoroughly until no harsh lines remain. This foundational understanding of technique creates the perfect base for everything else.
Highlighting was equally understated but impactful. A touch of luminous powder or cream on the high points of the cheekbones, bridge of the nose, and inner corners of the eyes created that coveted glow without looking shiny or artificial.
Eye Makeup Through the Decades
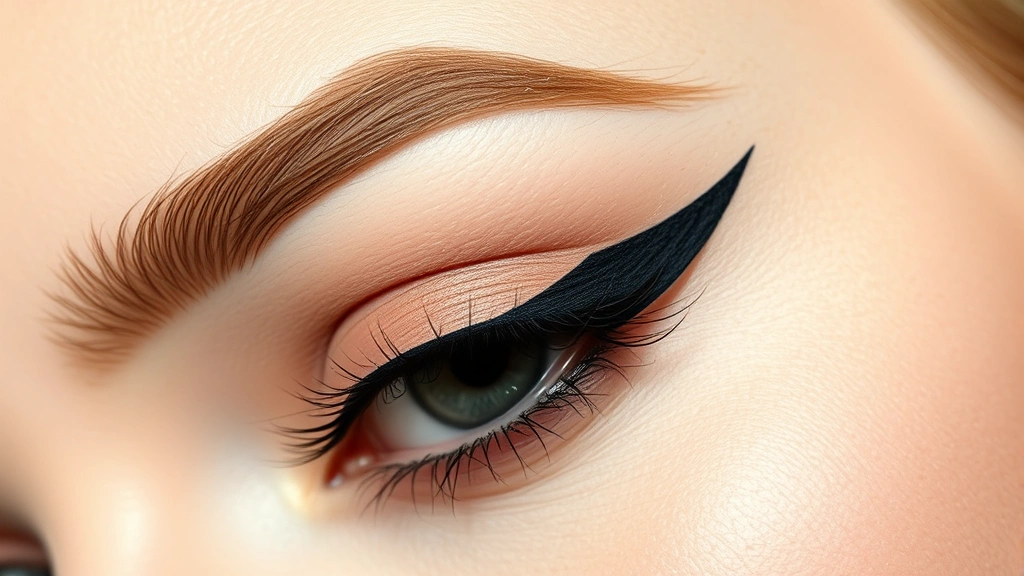
Eye makeup is where vintage looks truly shine. The 1950s winged eyeliner remains one of the most requested vintage techniques. To create this iconic look, use a black or dark brown liquid eyeliner or gel liner with a precise brush. Start at the inner corner of the eye, drawing a thin line along the lash line. As you reach the outer corner, angle the line upward and outward, creating the characteristic wing.
The key to perfect winged eyeliner is using tape as a guide. Place a piece of transparent tape at the outer corner of your eye, angling it toward your temple. This creates a clean edge and helps you achieve symmetrical wings on both eyes. Draw your eyeliner against the tape, then carefully remove it for a sharp, defined wing.
For 1960s mod makeup, apply a thick black eyeliner all around the eye, creating a bold definition. Layer false lashes or apply mascara generously for dramatic impact. Add a stark white or nude eyeshadow on the inner lid and in the inner corner to create that signature mod contrast. This technique creates dramatic visual effects that define your entire face.
The 1970s brought softer eye makeup with emphasis on cream eyeshadows in bronze, gold, and copper tones. Apply these with your fingertip or a flat brush, blending them across the eyelid. Layer slightly deeper tones in the crease for dimension without harsh lines. This approach creates a more blended, diffused eye look that’s incredibly wearable.
Eyebrow shaping varies by era. The 1920s favored thin, highly arched brows. The 1950s preferred fuller, naturally shaped brows with a subtle arch. The 1970s embraced thicker, bushier brows with minimal shaping. Determine your desired era and groom your brows accordingly using a spoolie and brow product.
Lips and Cheeks: Vintage Color Application
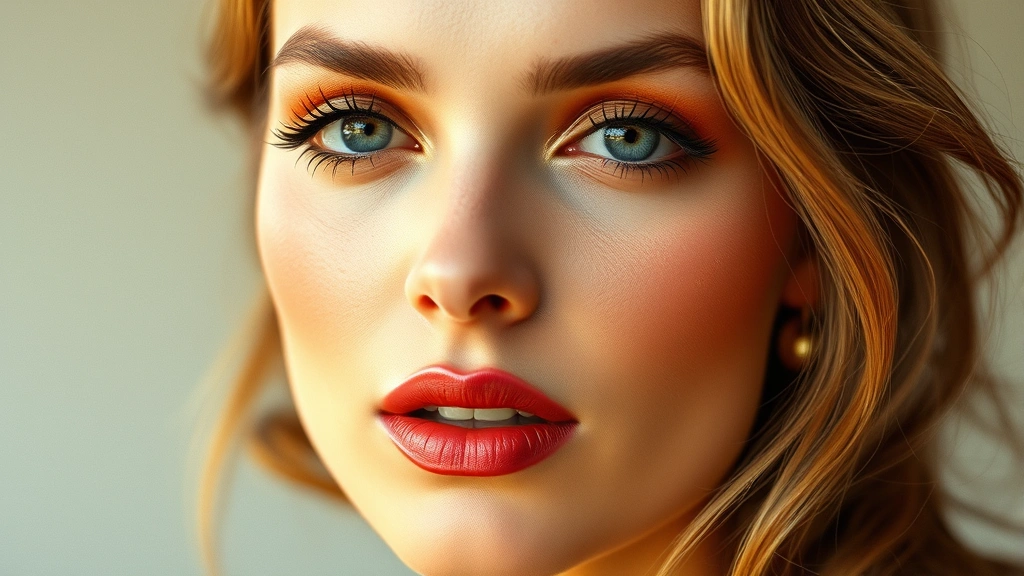
Lip color is perhaps the most recognizable element of vintage makeup. The 1950s favored blue-toned reds and deep berry shades applied with precision using a lip brush. Always outline your lips first with a lip liner matching your lip color, then fill in with lipstick. This creates definition and prevents feathering.
For a classic vintage lip, blot with tissue after the first application, then apply a second layer. This creates a more lasting, sophisticated finish than single-layer application. The matte lipsticks of the past required this technique, and it remains effective today.
The 1970s brought warmer lip tones—terracotta, brick red, and warm browns dominated this era. These shades paired beautifully with the warm eyeshadows of the time. Apply these with the same precision as classic reds, using a lip brush for clean edges.
Cheek color application in vintage makeup emphasized placement and blending. Rather than applying blush directly to the apples of your cheeks, vintage techniques focused on the cheekbones. Smile, find the highest point of your cheekbone, and apply blush slightly above and behind this point, blending toward the temple.
The 1950s favored soft pink and peachy tones applied with a light hand. The 1970s embraced deeper terracotta and bronze shades. Regardless of era, blend your blush thoroughly to avoid harsh lines. Cream blushes work beautifully for vintage looks, as they blend seamlessly and create that soft, natural finish.
Tools and Products for Authentic Results
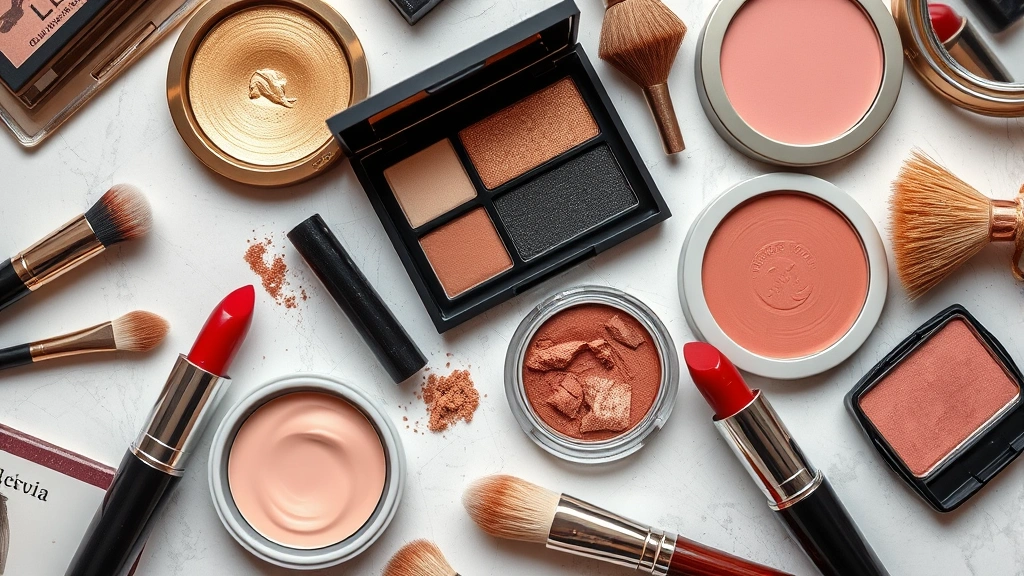
Achieving vintage makeup requires understanding which tools and products work best. Natural hair brushes were the standard in classic eras, and they remain superior for blending and application. Invest in quality brushes for foundation, eyeshadow, blush, and contouring. Natural fibers pick up and distribute product more smoothly than synthetic alternatives.
Cream-based products dominated vintage makeup. Cream eyeshadows, cream blushes, and cream contour products blend beautifully and create that signature soft finish. These products require a different application technique than powders—use your fingertip or a damp brush for seamless blending.
Liquid eyeliner is essential for achieving those perfect vintage wings. Gel liners offer excellent precision and longevity. Avoid liquid liners that dry too quickly, as they’re difficult to work with for intricate designs. Many professional makeup artists who specialize in vintage looks prefer gel liners with angled brushes for maximum control.
According to Allure magazine, vintage makeup techniques are experiencing renewed interest among beauty professionals. The emphasis on quality products and proper technique aligns with current trends toward sustainability and mindful consumption.
Look for products labeled as cream formulas, and don’t shy away from vintage brands that are still in production. Many classic makeup lines have been reformulated with modern ingredients while maintaining their original application properties. These products often perform better for vintage looks than modern alternatives.
Creating Your Vintage Makeup Kit
Building a vintage makeup collection requires strategic product selection. Start with a quality foundation in your exact skin tone—vintage makeup emphasized matching rather than contouring, so precision here is crucial. Add a cream or powder blush in at least two shades: a softer tone for everyday wear and a deeper shade for evening looks.
Invest in a good black eyeliner, preferably a gel or liquid formula for precision. Add eyeshadows in neutral tones—taupes, browns, golds, and soft pinks provide versatility across vintage eras. For lips, select classic shades: a blue-toned red, a warm red, a coral, and a neutral nude. These four shades cover most vintage lip trends.
Don’t forget the importance of creating the right conditions for makeup application—good lighting is essential. Natural light or a makeup ring light helps you see exactly what you’re doing, preventing over-application and ensuring symmetry. This is especially important when creating precise vintage looks.
Add quality brushes to your kit: a foundation brush, fluffy blending brush, flat shader brush, small crease brush, angled brush for eyeliner, and blush brush. Natural hair brushes work best, though high-quality synthetic brushes are acceptable alternatives. A good spoolie brush is essential for grooming eyebrows and blending eyeshadow.
Consider adding setting spray to your collection. While vintage makeup artists didn’t have modern setting sprays, they used techniques to make makeup last. A light mist of setting spray helps vintage-style makeup maintain its flawless appearance throughout the day.
According to beauty professionals specializing in period makeup, understanding product formulation helps you select items that perform like vintage products. Many modern formulations are too silicone-heavy for authentic vintage application, so read ingredient lists carefully.
The resurgence of vintage makeup interest reflects broader beauty trends emphasizing technique over trends. When you master the specific requirements of each technique, you develop skills applicable to any makeup style. Vintage makeup teaches precision, blending, and the importance of understanding your face’s unique features.
Practicing vintage techniques takes time and patience. Start with one era that appeals to you, mastering its signature looks before exploring others. Take photos in natural light to assess your blending and application. Watch tutorials from professional makeup artists who specialize in vintage looks. The more you practice, the more confident and skilled you’ll become.
Remember that vintage makeup is ultimately about understanding principles rather than rigidly following rules. Adapt classic techniques to suit your features, coloring, and personal style. The goal is creating looks that make you feel beautiful and confident, whether you’re recreating authentic vintage styles or drawing inspiration from classic eras.
FAQ
What’s the best way to learn vintage eyeliner techniques?
Practice with a gel or liquid eyeliner and use tape guides initially. Start with thinner lines and gradually build precision. Practice on days when you’re not going anywhere so you can focus on technique without pressure. Many makeup artists recommend practicing one style until you achieve consistency before moving to other vintage eras.
Can vintage makeup work for all skin tones?
Absolutely. While classic tutorials often featured limited shade ranges, vintage makeup principles apply universally. Adjust color selections to complement your specific undertones—warm undertones pair beautifully with terracotta and warm reds, while cool undertones benefit from blue-toned reds and cool-toned eyeshadows.
How do I make vintage makeup last all day?
Use a good primer, apply products with light hands to avoid excess buildup, and set with powder only where needed. Modern setting sprays help vintage makeup formulations last longer. Cream products often last better than powders when applied over primer, which is why vintage makeup emphasized cream formulas.
Is vintage makeup suitable for mature skin?
Yes, vintage makeup often flatters mature skin beautifully. The emphasis on blending and the use of cream products creates a softer, more natural finish that doesn’t emphasize fine lines. Avoid over-powdering and focus on strategic highlighting to create dimension.
What’s the difference between 1950s and 1970s makeup?
The 1950s featured dramatic winged eyeliner, cool-toned reds, and soft, feminine colors applied with precision. The 1970s embraced warmer, earthier tones, cream eyeshadows, softer eye definition, and a more natural approach overall. Both eras valued flawless skin but achieved it differently.
Related Posts
Perfect Old Fashioned Donut: Baker’s Secrets
Old Fashioned Chocolate Pie Recipe? Chef’s Favorite
