Maximize Your Lipstick? Expert Tips Inside
Maximize Your Lipstick: Expert Tips to Get the Most From Every Tube
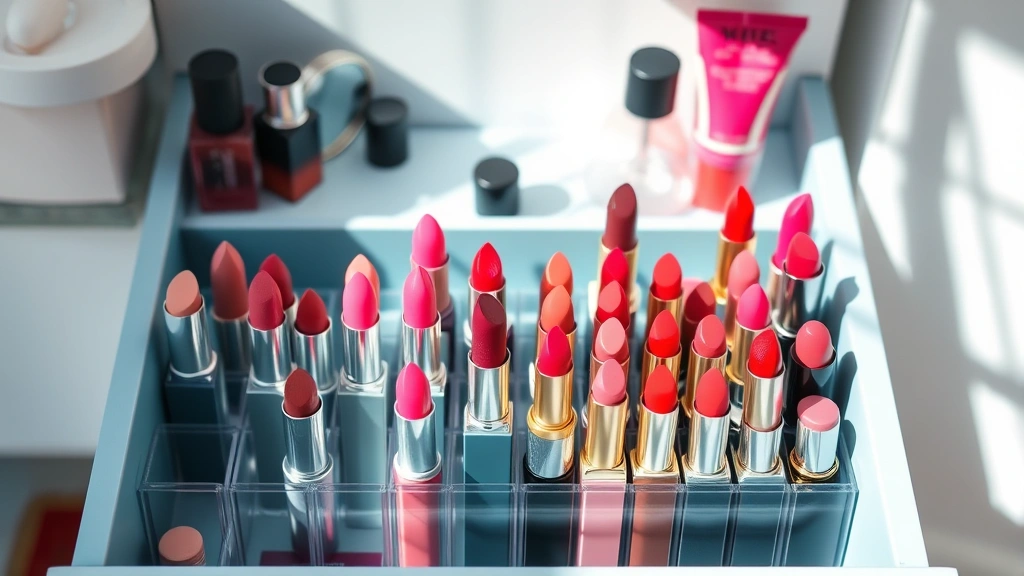
Lipstick is one of the most versatile and transformative makeup products in any beauty collection, yet many of us don’t fully maximize what each tube has to offer. Whether you’re a daily lipstick wearer or someone who saves it for special occasions, learning how to extend the life of your lipstick and apply it strategically can save you money and help you discover new looks you never thought possible. From proper storage techniques to application methods that prevent waste, we’re diving deep into the expert strategies that professional makeup artists use to get every last drop of color from their lipsticks.
The truth is, most people throw away lipsticks when they still have 30-40% of the product remaining simply because they don’t know how to access it properly. In this comprehensive guide, we’ll explore techniques used by makeup professionals, dermatologists’ recommendations for lip health, and creative application methods that transform how you use this essential beauty staple. Whether your lipstick collection is modest or extensive, these tips will help you become a lipstick expert.
Proper Storage Techniques for Lipstick Longevity
The environment where you store your lipsticks has a dramatic impact on how long they last and how effectively you can use them. Heat is the enemy of lipstick formulations, causing them to melt, separate, and become difficult to apply evenly. Professional makeup artists store their lipsticks in cool, dark places—often in dedicated makeup organizers kept in bedroom drawers or bathroom cabinets away from direct sunlight and heat sources.
Temperature fluctuations are particularly damaging to lipstick integrity. When lipsticks are exposed to warm temperatures and then cooled repeatedly, the oils and waxes that comprise the formula can separate, creating a grainy texture that makes application messy and uneven. This is why storing lipsticks in the refrigerator is actually a professional trick many makeup artists employ during hot months. A cool lipstick also applies more precisely, giving you better control over where the color lands on your lips.
Humidity also plays a role in lipstick degradation. Bathrooms, while convenient, are actually poor storage locations due to moisture from showers and baths. Instead, store your collection in a bedroom drawer in a designated organizer. If you travel frequently, invest in a lipstick case with a tight seal that protects from temperature and humidity changes. Keep your lipsticks upright rather than horizontal—this prevents the formula from settling unevenly and helps you access every bit of product when the tube gets low.
Understanding the physical environment of your storage space is crucial. The ideal temperature for lipstick storage is between 60-70°F, away from radiators, sunny windowsills, and heat vents. Many beauty professionals maintain their lipstick collections in climate-controlled spaces specifically for this reason. This attention to storage detail means your lipsticks maintain their original texture, color payoff, and longevity throughout their entire lifecycle.
Maximizing Product Application Methods
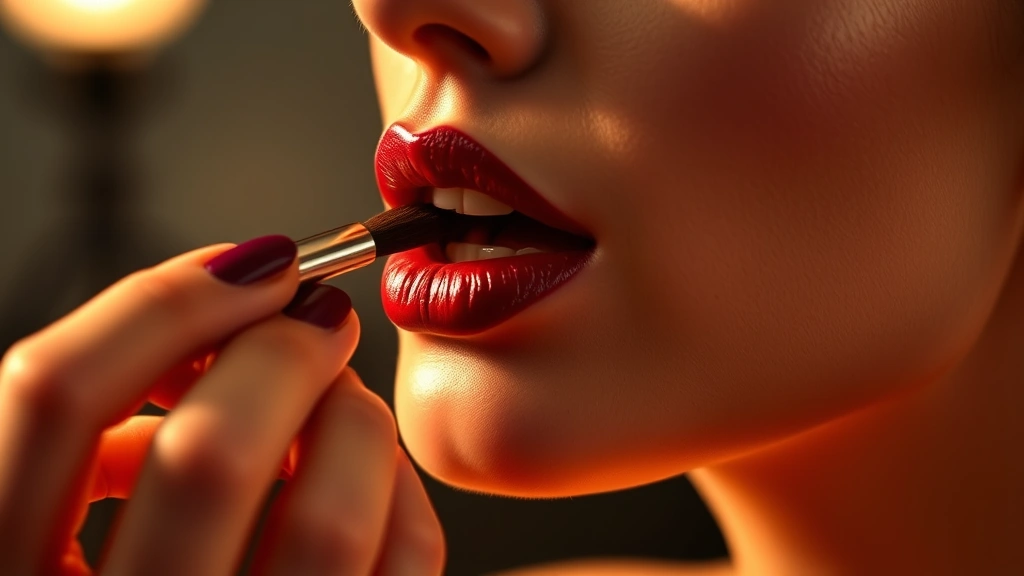
How you apply your lipstick directly determines how much product you use with each application. Many people use far more lipstick than necessary simply because they apply it directly from the tube without precision. Professional makeup artists use lipstick brushes for nearly every application, and this single technique can extend the life of your lipstick by 40-60 percent.
A quality lip brush gives you control that the lipstick tube’s built-in applicator simply cannot match. When you apply lipstick directly from the tube, you’re often depositing far more product than needed, and you’re applying it unevenly, which means some areas have heavy coverage while others are patchy. With a brush, you can use minimal product to achieve full, even coverage. Start by swiping the brush along the lipstick surface just once—this picks up enough product for a full lip application. For a second layer or deeper color, you can always add more, but starting minimal prevents waste.
The technique matters too. Rather than applying lipstick in one swipe across your lips, use small, precise strokes following your natural lip line. Start at the corners of your mouth and work toward the center, then fill in the interior of your lips with gentle dabbing motions. This method uses less product while ensuring even color distribution. Many makeup artists recommend the “ombre lip” technique, where you apply darker lipstick to the outer edges and a lighter shade or gloss to the center—this creates dimension while using less total product.
Understanding the built environment of your makeup application space matters too. Good lighting is essential for precise application. Apply your lipstick in natural daylight or near a well-lit mirror so you can see exactly where the color is going. Poor lighting leads to uneven application and wasted product as you try to correct mistakes.
Extraction and Recovery Strategies
When your lipstick tube reaches that frustrating stage where you can’t seem to get enough product on the applicator anymore, don’t toss it. Professional makeup artists have several strategies for extracting the remaining lipstick and putting it to good use.
The most effective extraction method involves using a clean lip brush or small spatula to scrape the remaining lipstick from the tube’s sides and bottom. Tilt the tube at an angle and gently scrape along the interior walls—you’ll be surprised how much product remains even when the built-in applicator can no longer reach it effectively. Some artists use small wooden skewers or clean toothpicks for this purpose. Collect this scraped lipstick and deposit it into a small clean container, where you can mix it with a bit of lip balm or petroleum jelly to create a custom lip tint or stain.
Another recovery technique involves melting the remaining lipstick. Place the scraped lipstick into a small heat-safe container and warm it gently over a candle flame or in a warm water bath. Once melted, you can pour it into a small pot or lip tin, where it will solidify into a new product. This technique allows you to combine multiple lipstick remnants into entirely new shades—a creative way to extend your collection and experiment with custom colors.
For tube lipsticks that are particularly stubborn, try warming the tube slightly under warm running water. The warmth softens the formula enough that you can access more product. However, be cautious not to overheat, as this can damage the lipstick’s texture. This method works particularly well with creamy, moisturizing formulas that are prone to hardening at room temperature.
Some beauty professionals recommend freezing lipstick tubes after use if you live in a warm climate. This prevents the formula from softening excessively and maintains its original consistency, making it easier to access product precisely when you need it.
Layering and Blending Techniques
Strategic layering is one of the most underutilized techniques for maximizing lipstick impact while using minimal product. Rather than applying one heavy coat of a single lipstick color, professional makeup artists layer multiple shades and finishes to create dimensional, long-lasting color that appears more vibrant with less total product.
Start with a lip liner in a shade that matches or complements your lipstick choice. This creates a base that helps your lipstick adhere better and prevents feathering. A quality lip liner also helps you stretch your lipstick further—the liner fills in fine lines and provides structure, so your lipstick doesn’t need to do all the work. Apply the liner to your entire lip area, not just the outline, for even color distribution.
Next, apply your lipstick with a brush using light pressure. This first layer establishes your base color. Then, using a clean lip brush or your finger, blend a slightly lighter shade or a sheer gloss into the center of your lips. This ombre effect creates visual interest and the appearance of fuller, more dimensional lips while actually using less total product than a single heavy application.
For maximum impact with minimal product, try the expert techniques shared by makeup professionals who layer cream and matte formulas. A thin layer of cream lipstick provides moisturizing slip, while a matte lipstick applied on top adds color intensity and longevity. This combination feels comfortable and looks professional while using less of each product than you would if applying them individually.
Blending is equally important. Rather than sharp lines between colors, use a clean brush or lip blending brush to soften transitions between shades. This creates a seamless gradient that appears intentional and polished, and it also helps the color appear more saturated, meaning you need less product to achieve full coverage.
Extending Wear Time and Preventing Feathering
One of the biggest reasons people waste lipstick is feathering—when color bleeds beyond the lip line, creating an unflattering appearance that often leads to reapplication and product waste. Understanding proper application techniques and social practices around lipstick wear helps you maintain your application longer with less frequent touch-ups.
Lip primer is a game-changer for extending wear time. A thin layer of lip primer creates a smooth base that helps lipstick adhere more effectively and prevents feathering. Many professional makeup artists recommend applying primer to the entire lip area, paying special attention to the lip line. This single step can extend the wear time of your lipstick by 4-6 hours, meaning you apply lipstick less frequently throughout the day and waste less product.
The order of application matters significantly. Apply lip primer first, then lip liner, then lipstick, then a setting spray or translucent powder. This layering technique creates a seal that locks your lipstick in place. While it might seem like you’re using more products, you’re actually extending the life of your lipstick so dramatically that you use less overall.
Setting spray designed for lips is a professional secret that most people overlook. A light mist of setting spray after lipstick application helps the color stay put for hours longer. This means fewer reapplications and significantly less lipstick used throughout the day. Some makeup artists even recommend a very light dusting of translucent powder over wet lipstick—this sets the color without creating a chalky appearance.
Preventing feathering also involves choosing the right formula for your lip texture. If you have naturally dry lips, a creamy or satin lipstick will perform better and last longer than a matte formula. If you have oily lips, you might prefer a matte or long-wearing formula that resists smudging. Selecting the right formula for your lip type means the lipstick stays put longer and you need fewer touch-ups.

Creative Uses Beyond Traditional Lip Application
Once you’ve mastered maximizing your lipstick for lip application, explore creative alternative uses that extend the life of your collection in entirely new ways. Professional makeup artists and beauty enthusiasts have discovered numerous applications for lipstick beyond the lips.
Cream and satin lipsticks make excellent cream blush and contour products. Apply a small amount to the apples of your cheeks or along your cheekbones and blend with a damp beauty sponge or brush. The color translates beautifully to cheeks, and because you’re using such a small amount, your lipstick lasts significantly longer. Many makeup artists keep a nude or warm-toned lipstick specifically for this dual-purpose use.
Lipstick can also be used as an eyeshadow base or shadow itself, particularly cream and satin formulas. A warm brown lipstick creates a beautiful neutral eyeshadow, while a berry or mauve shade adds dimension to neutral eye looks. Apply with a brush and set with powder to ensure longevity. This technique works particularly well with lipstick colors that don’t suit your skin tone for lips but look beautiful on eyes.
For those interested in sustainability and makeup artistry, melted lipstick can be combined with coconut oil or shea butter to create custom lip balms or tints. This transforms lipstick remnants that might otherwise be discarded into new, usable products. You can even add a tiny amount of mica powder to create shimmery lip balms with custom colors.
Some beauty professionals use lipstick as a cream contour or highlight product. A deeper lipstick shade applied to the hollows of your cheeks and blended creates subtle, natural-looking contour. Similarly, a champagne or nude shimmer lipstick applied to your brow bone and inner corners of eyes creates dimension and light-reflection.
Understanding the relationship between environment and beauty practices encourages creative reuse and sustainable makeup habits. By finding multiple uses for each product, you reduce waste and develop a more intentional relationship with your beauty collection.
For artistic individuals, lipstick can even be used for nail art. A thin layer of lipstick applied to nails and sealed with clear topcoat creates a coordinated manicure that matches your lip color. This is particularly effective for special events where you want a cohesive beauty look.
FAQ
How long does lipstick actually last if stored properly?
With proper storage in a cool, dark place, most lipsticks maintain their quality for 18-24 months. However, the usable lifespan of a single tube—before you physically cannot access more product—typically extends 2-3 years with careful application techniques and extraction methods. Professional makeup artists often keep lipsticks longer by using extraction and recovery techniques.
Can you sanitize lipstick for reuse or sharing?
Yes, lipstick can be sanitized by scraping away the top layer with a clean spatula or knife and wiping the surface with a clean tissue. However, if sharing lipstick with others, it’s safest to use a brush applicator rather than direct application. According to dermatological guidelines, direct lip-to-product contact can transfer bacteria and viruses, so brush application is always preferable for hygiene.
What’s the best way to prevent lipstick from drying out lips?
Proper lip care is essential before lipstick application. Exfoliate lips gently 2-3 times weekly, then apply a moisturizing lip balm before lipstick. Allow the balm to set for a minute before applying color. Using a lip primer also creates a barrier that prevents lipstick from drying lips. If you have chronically dry lips, consider consulting a dermatologist about underlying causes.
Is it safe to use very old lipstick?
Lipstick older than 2-3 years may have separated, oxidized, or accumulated bacteria, making it less safe and less pleasant to use. If your lipstick smells off, has changed texture significantly, or shows signs of mold, discard it. However, properly stored lipstick that appears normal and smells fine can typically be used safely beyond the standard timeline.
Can you mix different lipstick brands together?
Yes, you can mix lipstick colors and brands to create custom shades. Scrape lipstick from both tubes into a small container and warm gently to melt. Stir thoroughly to combine colors evenly, then allow to cool and solidify. This is a creative way to use up remnants and experiment with custom colors you might not find in stores.
What’s the difference between lip liners and lipsticks in terms of longevity?
Lip liners typically last longer than lipsticks because they’re used more sparingly and have a smaller surface area. A single lip liner can last 6-12 months with regular use, while lipsticks usually last 3-6 months. However, using both products strategically extends the lifespan of each by reducing the amount needed for full coverage.
Related Posts
Perfect Old Fashioned Donut: Baker’s Secrets
Old Fashioned Chocolate Pie Recipe? Chef’s Favorite
