
Old Fashioned Banana Pudding: Pro Tips
Old Fashioned Banana Pudding: Pro Tips for Perfect Results Every Time
There’s something undeniably nostalgic and comforting about a classic old fashioned banana pudding. This timeless dessert has graced family tables for generations, combining layers of creamy custard, fresh bananas, and crispy vanilla wafers into one irresistible treat. Whether you’re preparing it for a holiday gathering, a potluck dinner, or simply craving that warm, familiar taste of home, mastering the art of banana pudding elevates your dessert game significantly.
The beauty of old fashioned banana pudding lies not just in its simplicity, but in the careful attention to detail that separates a mediocre version from an absolutely memorable one. Every component—from the custard’s silky texture to the wafer’s structural integrity—plays a crucial role in creating the perfect balance of flavors and textures. In this comprehensive guide, we’ll explore professional techniques, ingredient selection strategies, and insider secrets that will transform your banana pudding from ordinary to extraordinary.
Selecting Premium Ingredients for Maximum Flavor
The foundation of an exceptional old fashioned banana pudding begins with ingredient selection. Quality matters tremendously when working with such a limited ingredient list. Start with fresh, ripe bananas that display a deep yellow color with minimal brown spots. These bananas have developed their full sweetness and creamy texture, which are essential for authentic flavor. Avoid overly green bananas, as they lack sweetness, and steer clear of heavily spotted ones that may have begun deteriorating.
For the custard component, whole milk and egg yolks create a richer, more luxurious base than condensed milk shortcuts. Look for pasteurized eggs if you have concerns about raw egg consumption, or consider using high-quality egg products specifically designed for custards. Real vanilla extract, not imitation, provides the authentic flavor profile that distinguishes professional-grade banana pudding. The difference between real and imitation vanilla is immediately apparent to discerning palates.
Vanilla wafers represent another critical component. Traditional recipes call for Nabisco vanilla wafers, which have the ideal thickness and structural integrity to absorb moisture without becoming mushy. Some bakers prefer slightly stale wafers, as they maintain their shape better during assembly. Store-bought wafers that have been sitting in your pantry for a week or two often work better than freshly opened boxes.
Sugar quality also influences the final result. Fine granulated sugar dissolves more evenly into custards than coarser varieties, creating a smoother texture. For the whipped cream topping, heavy cream with a higher fat content (36-40%) whips to greater volume and holds its structure longer than lighter cream alternatives.
Mastering the Perfect Custard Base
The custard represents the soul of old fashioned banana pudding, and achieving the perfect consistency requires precision and patience. Begin by whisking together egg yolks and sugar until the mixture becomes pale and thick, approximately three to four minutes of vigorous whisking. This step incorporates air and ensures even sugar distribution, preventing graininess in the final custard.
Heat milk to approximately 180°F (82°C)—just below boiling—before slowly tempering the egg mixture. Tempering involves gradually adding hot milk to the egg-sugar mixture while whisking constantly, preventing the eggs from scrambling. Add the hot milk in a thin stream, whisking continuously, until you’ve incorporated about half the milk. This gradual process brings the egg mixture’s temperature up safely.
Pour the tempered egg mixture back into the remaining hot milk, whisking constantly. Return the entire mixture to the stovetop over medium heat, continuing to whisk until it reaches 160°F (71°C), ensuring food safety while creating a silky texture. The custard should coat the back of a spoon when properly cooked—a test performed by dipping a spoon into the mixture and running your finger across the back. If the line remains clear, the custard is ready.
Remove from heat immediately and strain through a fine-mesh sieve to remove any cooked egg bits, creating an impossibly smooth custard. Stir in vanilla extract and a pinch of salt, which enhances vanilla flavor. Allow the custard to cool slightly before assembly, as hot custard will soften wafers excessively. Many professionals prepare custard several hours ahead, refrigerating it until assembly time.
For those concerned about raw eggs or preferring foolproof methods, culinary experts recommend using pasteurized eggs or egg products in custard recipes. This ensures both safety and consistency, particularly important when preparing large quantities for gatherings.
Preparing Bananas for Optimal Texture
Banana preparation timing significantly impacts the final dessert’s quality. Cut bananas immediately before assembly to minimize browning and maintain their firm texture. Toss sliced bananas gently with a tablespoon of fresh lemon juice, which prevents oxidation and adds subtle brightness that complements the vanilla and banana flavors beautifully.
Slice bananas approximately one-quarter inch thick, maintaining uniform sizing for consistent texture throughout each bite. Thicker slices maintain their integrity through the layering and chilling process, while thinner slices become mushy and create an unpleasant texture. Some professional pastry chefs reserve the most attractive banana slices for the top layer, creating a visually stunning presentation.
Consider the ripeness of your bananas carefully. Slightly underripe bananas hold their shape better during assembly and chilling, while fully ripe bananas provide superior flavor but require extra care during handling. The ideal banana for this application sits between these extremes—fully yellow with minimal brown spots, indicating peak ripeness without excessive softness.
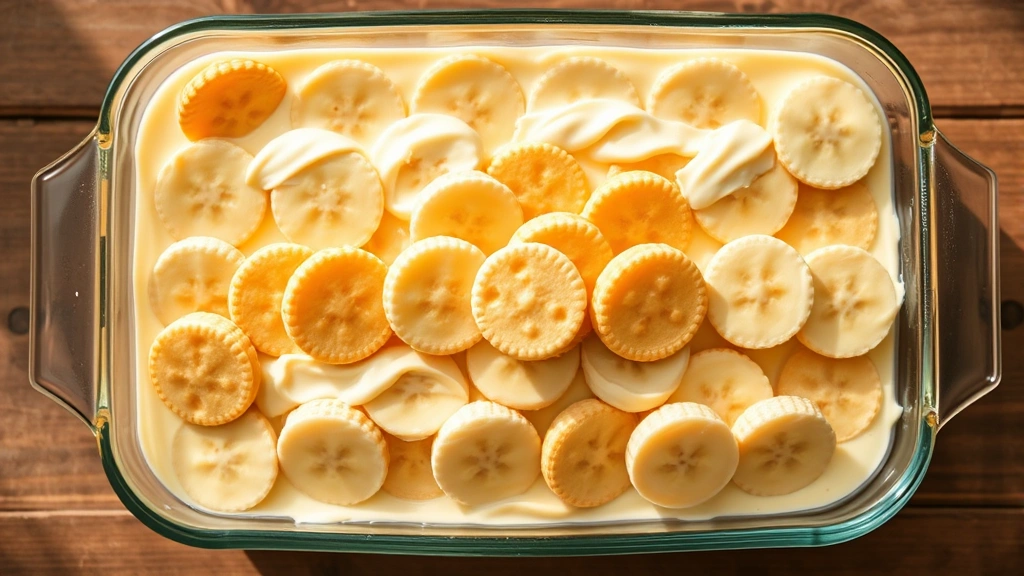
Layering Techniques That Matter
Proper layering creates the signature texture that makes old fashioned banana pudding so beloved. Begin with a thin layer of custard on the bottom of your serving dish, creating a barrier between the dish and wafers that prevents sogginess while maintaining structural integrity. Arrange vanilla wafers in a single layer, slightly overlapping, atop this custard base.
Distribute banana slices evenly across the wafer layer, ensuring every bite contains both wafer and banana. Pour additional custard over the bananas, covering them completely and creating moisture that will gradually soften the wafers to the ideal texture. Repeat this process—wafers, bananas, custard—until all components are used, finishing with a custard layer that will eventually be topped with whipped cream.
The traditional three-layer approach works beautifully in most dishes: wafers, bananas, custard repeated three times. However, larger gatherings may require four or five layers. The key is ensuring adequate custard throughout—every wafer should be surrounded by custard, though not drowning in it. Too little custard results in dry pudding; excessive custard creates a soupy, unstable dessert.
Some bakers create a hybrid layer by crushing some vanilla wafers and sprinkling them between custard layers, creating additional texture variation. This technique, inspired by tiramisu-style preparations, adds sophisticated textural complexity that elevates the dessert beyond basic versions.
Chilling and Storage Best Practices
Refrigeration time is not merely a convenience step—it’s essential for proper flavor development and texture maturation. Allow your assembled banana pudding to chill for at least four hours, though overnight refrigeration produces superior results. During this time, custard permeates the wafers, creating the signature soft-yet-structured texture that defines authentic old fashioned banana pudding.
The chilling process also allows flavors to meld and deepen, creating a more cohesive taste experience than freshly assembled pudding. The vanilla becomes more pronounced, the banana flavor integrates throughout, and the overall dessert achieves remarkable balance that improves with time.
Store banana pudding covered in the refrigerator for up to two days, though quality peaks within the first 24 hours. The wafers gradually soften, and bananas oxidize slightly, though lemon juice slows this process considerably. For gatherings, prepare pudding the day before serving to maximize flavor development while maintaining acceptable texture.
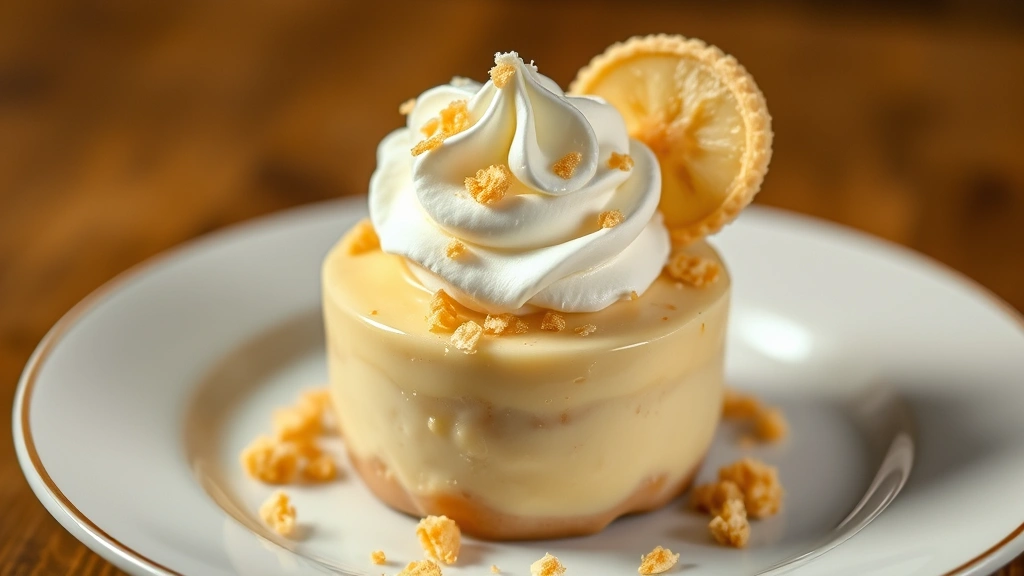
Whipped cream topping should be added as close to serving time as possible, ideally within two hours of presentation. This preserves the whipped cream’s light, airy texture and prevents it from weeping or deflating. If preparing whipped cream ahead, stabilize it with a tablespoon of powdered sugar and one-quarter teaspoon of gelatin per cup of heavy cream, allowing the cream to hold its structure for several hours.
Common Mistakes and How to Avoid Them
Even experienced bakers occasionally encounter banana pudding challenges. One frequent mistake involves using condensed milk as a shortcut, which creates an overly sweet, one-dimensional flavor lacking the complexity of proper custard. While convenient, condensed milk fundamentally changes the dessert’s character. Invest the extra fifteen minutes required for authentic custard preparation.
Another common error is assembling pudding too far in advance, allowing wafers to become excessively soft and lose their structural integrity. Conversely, assembling only a few hours before serving results in wafers that remain too firm, creating an unpleasant texture contrast. The four-hour minimum chilling time provides the ideal balance, though individual preferences vary.
Banana oxidation represents another challenge, particularly when pudding sits for extended periods. While lemon juice helps significantly, accepting some browning as natural and inevitable allows you to relax about perfection. The flavor remains excellent even as appearance slightly darkens.
Improper custard cooking—either undercooking, which creates a thin consistency, or overcooking, which produces graininess—undermines the entire dessert. Invest in a reliable instant-read thermometer and follow temperature guidelines precisely. The difference between 155°F and 165°F dramatically impacts final results.
Many bakers overfill their dishes with custard, creating a pudding that’s essentially custard soup with wafer bits. The proper ratio involves enough custard to coat all components while maintaining structural integrity. This typically requires approximately three cups of custard for a standard nine-by-thirteen-inch dish.
Finally, using low-quality vanilla extract creates a flat, artificial flavor that disappoints. Splurge on real vanilla extract—your taste buds will immediately recognize the investment’s value. The difference between imitation and authentic vanilla is particularly noticeable in custard-based desserts where vanilla is a primary flavor component.
Understanding these common pitfalls and implementing preventative strategies ensures consistent success. Each element of banana pudding preparation builds upon previous steps, creating a final dessert that showcases both technique and ingredient quality.
FAQ
Can I make old fashioned banana pudding without eggs?
Yes, though traditional recipes include eggs for food safety and texture. Consider using pasteurized egg products or egg substitutes specifically designed for custards. Alternatively, use a cooked custard base made with cornstarch as a thickener, though the texture differs slightly from traditional versions.
How far in advance can I prepare banana pudding?
Assemble banana pudding up to 24 hours before serving, with optimal flavor occurring after overnight refrigeration. Add whipped cream topping within two hours of serving to maintain its texture and appearance.
Can I freeze banana pudding?
Freezing is not recommended, as the wafers become excessively soft upon thawing, and the custard’s texture deteriorates. Banana pudding is best enjoyed fresh within two days of preparation.
What’s the best vanilla wafer substitute?
If traditional vanilla wafers are unavailable, try butter cookies or shortbread biscuits with similar thickness and structure. Avoid wafers that are too thick or too delicate, as they won’t absorb custard properly.
Can I make banana pudding in individual servings?
Absolutely. Layer components in small jars or glasses, creating individual portions perfect for portion control and elegant presentation. Individual servings also allow guests to take them home, making this dessert ideal for gatherings.
Should I refrigerate banana pudding immediately after assembly?
Yes, refrigerate within 30 minutes of assembly to allow proper chilling time and flavor development. This ensures optimal texture and taste when serving.
Related Posts
Perfect Old Fashioned Donut: Baker’s Secrets
Old Fashioned Chocolate Pie Recipe? Chef’s Favorite
