7 Layer Dip Recipe: Classic Makeup for Your Eyes
7 Layer Dip Recipe: Classic Makeup for Your Eyes
When it comes to timeless makeup techniques, the seven-layer eye look is as iconic and satisfying as the appetizer it’s named after. This classic approach to eyeshadow application has been a staple in the beauty world for decades, offering a foolproof method to create depth, dimension, and visual interest on the eyelids. Whether you’re a makeup beginner or a seasoned artist looking to refresh your technique, understanding how to properly layer eyeshadow can transform your entire eye makeup game.
The beauty of the seven-layer dip method lies in its versatility and forgiving nature. By building color gradually from light to dark, you create a seamless gradient that works whether you’re going for a subtle everyday look or a dramatic evening statement. This traditional approach teaches fundamental makeup principles that every beauty enthusiast should master, and once you understand the concept, you can adapt it endlessly to suit your personal style and preferences.
Understanding the Foundation of Eye Makeup
Before diving into the classic old fashioned 7 layer dip technique, it’s essential to understand why layering eyeshadow works so effectively. The human eye naturally draws to areas with contrast and depth, and the seven-layer method capitalizes on this by creating multiple zones of color intensity across the eyelid. This isn’t just about applying random colors—it’s a strategic approach to makeup application that follows the natural contours of your eye.
The concept behind this technique mirrors professional makeup artistry principles used in film, television, and high-fashion photography. By understanding how light and shadow interact with the eye’s three-dimensional structure, you can create looks that appear more professional and polished. The layering approach also allows for corrections and adjustments as you go, making it far more forgiving than trying to apply the perfect shade in one swipe.
According to beauty chemistry experts, the way eyeshadow pigments interact when layered creates optical blending that single-application methods cannot achieve. This is why the seven-layer approach remains relevant even with modern cosmetic innovations.

Layer One: Primer and Base
The foundation of any successful eye makeup application starts with proper preparation. Your first layer should always be an eyeshadow primer, which serves multiple critical functions. A quality primer creates a smooth base that helps eyeshadow adhere better, prevents creasing throughout the day, and can even enhance color payoff. Apply a small amount of primer across your entire eyelid, from the lash line to the brow bone, and blend it out with your fingertip or a flat brush.
After your primer sets for about thirty seconds, apply a neutral base color that matches your skin tone or is slightly lighter. This base layer serves as a canvas for all subsequent colors and helps them appear more vibrant. Many makeup artists recommend using a matte shade for this step, as it provides better grip for the colors you’ll layer on top. This foundational step is often overlooked by beginners, but it’s absolutely crucial for achieving the polished results that make the seven-layer technique so effective.
Layers Two Through Four: Building Your Gradient
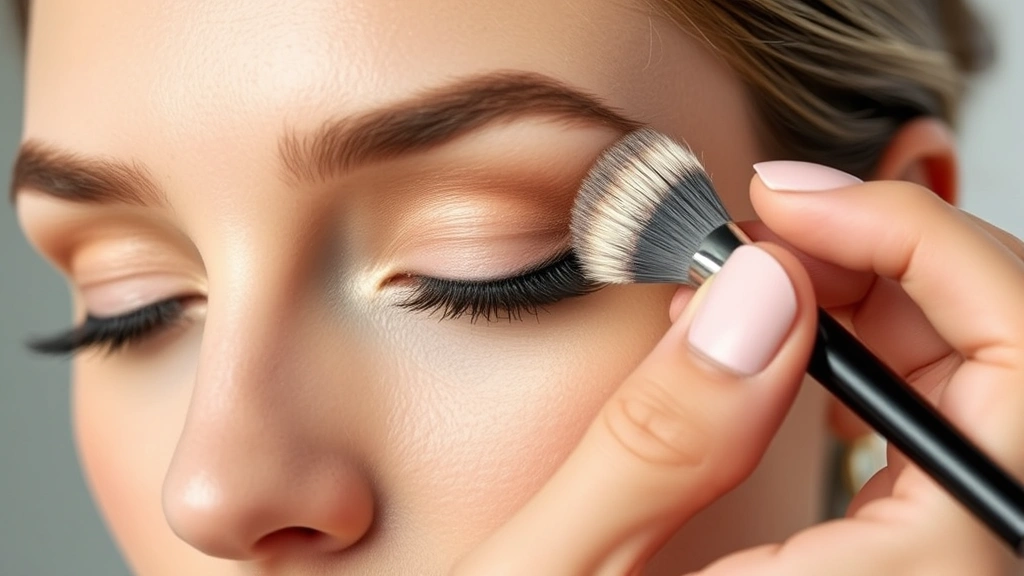
Now comes the heart of the classic makeup application: building your color gradient. Layers two through four involve applying increasingly darker or more saturated shades to create a smooth transition across your lid. Start with your lightest shade on the inner lid and lower brow bone, using a fluffy blending brush to apply color in windshield wiper motions. This creates a soft, diffused area of color that appears naturally blended.
For layer three, choose a medium shade that’s slightly darker than your base but lighter than your final crease color. Apply this to the middle of your lid and the upper portion of your eyelid, again using a blending brush to create soft edges. The key to success here is using minimal product and building gradually—you can always add more color, but removing it is much more difficult.
Layer four introduces your deepest lid color or a shade that provides more intensity. Apply this to the outer corner and along your upper lash line, concentrating the color where you want maximum impact. This is where you start to define the eye and create the dimension that makes the seven-layer technique so effective. Many beauty professionals recommend using slightly damp brushes for these middle layers, as moisture helps colors blend more seamlessly and reduces harsh lines.
Understanding how to properly apply makeup techniques requires patience and practice, but the seven-layer method provides a structured framework that makes learning easier.
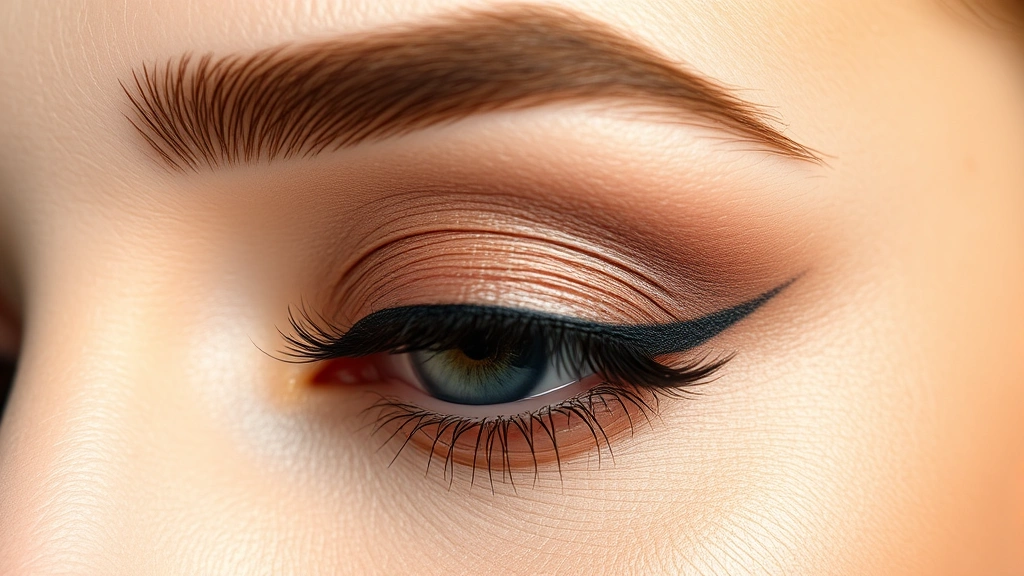
Layers Five Through Seven: Creating Dimension
The final three layers are where your eye makeup truly comes to life. Layer five involves applying color to your crease—the natural fold line on your eyelid. Using a slightly smaller, more precise brush, apply a shade that’s darker than your lid colors but complements your overall look. This crease color is essential for creating the illusion of depth and definition, making your eyes appear larger and more sculpted.
Layer six focuses on your brow bone highlight. Using a light, shimmery, or matte highlighter shade, apply this to the area just above your crease and below your eyebrow arch. This reflects light and creates a lifting effect that makes your eyes appear more awake and youthful. Blend this layer carefully to avoid any harsh lines, and remember that less is more when it comes to highlight application.
Layer seven is your finishing touch: the lower lash line and any additional definition you want to add. Many makeup artists apply a complementary shade along the lower lash line to frame the eye and create balance. Some add a touch of shimmer to the inner corner for brightness, while others extend their crease color slightly under the eye for added definition. This final layer is where you can get creative and personalize the look based on your preferences and the occasion.
The beauty of this systematic approach is that each layer builds on the previous one, creating a cohesive, professional-looking result. Even if you’re new to makeup application, following these seven distinct steps helps ensure you don’t skip important areas or apply too much product in one spot.
Tools and Brushes You’ll Need
Proper tools are absolutely essential for executing the seven-layer technique successfully. You’ll need a variety of brushes, each serving a specific purpose in the layering process. A fluffy blending brush is your most important tool—this large, rounded brush with soft bristles allows you to apply and blend color seamlessly without harsh lines. Invest in a quality blending brush, as it makes an enormous difference in your final results.
A flat shader brush is crucial for precise color application on your lid itself. This brush allows you to pick up concentrated color and apply it exactly where you want it. For your crease work, a smaller tapered blending brush gives you more control while still allowing for soft blending. A pencil brush or smudge brush works beautifully for your lower lash line and inner corner work.
Beyond brushes, you’ll want to have a few other essential tools: a primer, eyeshadow setting spray, and makeup remover. Many makeup artists also recommend keeping makeup wipes nearby during application for quick corrections. The investment in quality tools pays dividends in the ease and quality of your makeup application.
Pro Tips for Flawless Application
Experienced makeup artists have developed numerous tricks and techniques that make the seven-layer method even more effective. One crucial tip is to tap off excess product from your brush before applying it to your eyelid. This prevents overloading your brush and helps you maintain better control over color intensity and placement.
Another professional technique involves using setting spray between layers. A light mist of eyeshadow setting spray between your base and your first color layer helps lock everything in place and prevents colors from shifting throughout the day. This is especially helpful if you have oily eyelids or if you’re applying makeup for an event where it needs to last many hours.
Color selection is also critical for success. Choose complementary color families that work together harmoniously rather than clashing. If you’re working with warm tones, stick with warm throughout; if you prefer cool tones, maintain that palette. This creates a cohesive, professional appearance rather than a disjointed look.
Many beauty professionals also recommend starting with less saturated colors and building to deeper shades as you progress through the layers. This prevents the muddy appearance that can happen when you apply dark colors first and then try to add lighter shades on top.
According to Allure magazine, understanding how different undertones interact with your skin tone is key to selecting eyeshadow colors that make you look your absolute best.
Variations and Modern Twists
While the classic seven-layer dip technique remains timeless, modern makeup artists have created numerous variations that honor the traditional method while adding contemporary flair. The monochromatic eye approach uses different depths of the same color family across all seven layers, creating a sophisticated, cohesive look that works beautifully for professional settings or minimalist aesthetics.
The color-blocking technique maintains the seven-layer structure but uses distinctly different, non-blended color sections for a bold, modern appearance. This approach works particularly well for editorial makeup, artistic looks, or anyone wanting to make a statement with their eye makeup.
Some makeup artists have adapted the method into a five-layer quick version for everyday wear, eliminating some of the blending steps while maintaining the core principle of building dimension through layering. Others have expanded it into a nine or ten-layer approach for ultra-detailed, high-fashion looks.
The fundamental principle remains consistent across all variations: building color gradually from light to dark creates depth and dimension that single-application methods cannot achieve. Whether you follow the traditional seven-layer method exactly or adapt it to suit your style, understanding these core concepts will elevate your makeup application skills significantly.
For those interested in learning more about how different elements interact in a system, the seven-layer makeup technique provides an excellent practical example of layering principles in action.
According to Byrdie beauty experts, the seven-layer technique has experienced a resurgence in popularity among makeup enthusiasts seeking to master fundamental skills before experimenting with more avant-garde approaches.
FAQ
How long does the seven-layer eye makeup technique take to apply?
For beginners, expect to spend 10-15 minutes mastering this technique. As you practice and become more familiar with the process, application time typically decreases to 5-8 minutes. Experienced makeup artists can complete the full seven-layer look in just 3-4 minutes.
Can I use cream eyeshadows instead of powder for the seven-layer method?
Yes, absolutely! Cream eyeshadows work beautifully with the seven-layer technique. However, you may need to set each cream layer with a translucent powder to prevent colors from muddying together. Many makeup artists prefer mixing cream and powder products for optimal blending and longevity.
What’s the best way to fix mistakes while applying the seven layers?
Keep a damp brush nearby for quick corrections. If you apply too much color in one area, gently blend it out with a clean, slightly damp brush. For more significant mistakes, use a cotton swab dipped in makeup remover to carefully erase the error and start that layer again.
How do I make the seven-layer technique work for my eye shape?
The beauty of this method is its adaptability to all eye shapes. For hooded eyes, focus your crease color slightly higher than the natural crease. For monolid eyes, apply more color to the lid itself rather than relying heavily on crease definition. For deep-set eyes, use lighter shades on the lid and brow bone to create the illusion of projection.
Do I need to use expensive makeup products for the seven-layer method to work?
Not at all! The seven-layer technique works with any quality eyeshadow, whether drugstore or high-end. What matters most is having good brushes, a reliable primer, and understanding the application method. Many makeup artists create stunning results using affordable products combined with proper technique.
How can I adapt the seven-layer technique for different occasions?
For daytime, use lighter, more neutral shades and minimal shimmer. For evening, deepen your colors and add more sparkle. For special events, you can intensify any of the layers or add additional dimension. The variety of contexts and environments for makeup application means you can adjust your approach based on your needs.
Related Posts

Perfect Old Fashioned Donut: Baker’s Secrets
Old Fashioned Chocolate Pie Recipe? Chef’s Favorite
